
Creating a cohesive display with multiple frame stands on shelves relies on balancing physical stability with visual depth. Instead of lining frames up in a flat, uniform row, you can achieve a professional look by layering stands of varying heights, anchoring the arrangement with a dominant piece, and maintaining consistent thematic elements. This approach transforms a simple shelf into a curated gallery that feels intentional rather than cluttered.
To achieve this, you must consider both the aesthetic relationships between your frames and the physical limitations of your shelving. A successful arrangement looks balanced from every angle while remaining securely positioned on its surface. By understanding how to manipulate height, depth, and spacing, you can design a dynamic display that showcases your favorite memories or art pieces beautifully.
Planning Your Frame Stand Arrangement
Before placing any frames, it is essential to evaluate the physical characteristics of your shelf. Measure the shelf depth to ensure it can comfortably accommodate the footprint of your frame stands. Easel-back stands and tripod-style frames require a certain amount of rear clearance to lean back safely. If a shelf is too shallow, the stand may sit at a precarious angle or overhang the edge, increasing the risk of a fall.
Products mentioned in this guide





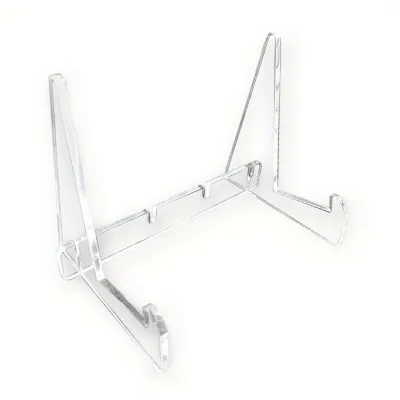
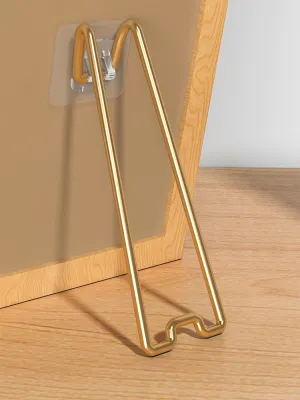

Prices are valid at publication and may change. Please refer to the product page for the latest price.
Vertical clearance is another critical measurement to check before styling. Ensure there is ample space between the top of your tallest frame and the shelf above it. A cramped frame that nearly touches the upper shelf can make the entire display look crowded and poorly planned. Aim for at least a few centimeters of open space above your tallest piece to let the arrangement breathe.
Weight capacity must also be verified, especially if you are using heavy materials like solid wood, metal, or thick glass on floating shelves. Overloading a shelf can cause it to sag or pull away from the wall over time. For secure installation of floating shelves, ensure they are anchored directly into wall studs or using appropriate heavy-duty wall anchors, preferably installed by a qualified professional.
Once the physical limits are established, group your frames by a common visual theme. This could be a shared color palette, matching frame materials, or a consistent photographic style, such as black-and-white prints. Grouping your items beforehand establishes a styling baseline, making it much easier to achieve a cohesive look when you begin arranging them on the shelf.
Finally, inspect the surface material of your shelf. Highly polished surfaces like glass, marble, or high-gloss lacquer offer very little friction, which can cause frame stands to slide or shift. Understanding these surface characteristics early allows you to prepare the necessary non-slip solutions before you begin the styling process.
Step-by-Step Guide to Arranging Frame Stands
The first step in physical arrangement is placing your largest or most visually heavy frame stand. This piece acts as the primary anchor for the entire display. Instead of placing it dead-center, position it slightly to one side of the shelf. An off-center anchor creates a more dynamic and visually interesting composition, preventing the display from looking too symmetrical or rigid.

Next, begin layering smaller frame stands around and slightly in front of your anchor piece. Layering is the key to creating depth and dimension on a flat shelf. Position a medium-sized frame so that it partially overlaps the outer edge of the larger anchor frame. This overlapping technique draws the eye through the display, creating a sense of three-dimensional space.
When layering, be careful not to obscure the primary subject of the photograph or artwork in the background. The overlapping frame should only cover empty space or less critical details of the image behind it. If a frame blocks an important part of a photo, adjust its position or swap it with a smaller stand to maintain visual clarity.
Introduce a third, smaller frame stand to complete the initial cluster. This smallest frame can be placed further forward, creating a clear foreground, midground, and background. This three-tiered structure mimics professional gallery styling and makes the arrangement feel complete.
As you add more frames, pay close attention to the spacing between your clusters. Avoid the temptation to fill every inch of the shelf with frames. Leaving intentional gaps of empty space—often referred to as negative space—allows the viewer’s eyes to rest. This contrast between filled and empty areas is what prevents a multi-frame display from looking cluttered.
Once you are satisfied with the visual arrangement, perform a physical safety check on each frame stand. Ensure that the entire base or support leg of every stand is resting fully on the shelf surface. No part of a stand’s footprint should overhang the front or back edge of the shelf. Even minor vibrations from nearby footsteps, closing doors, or household activity can cause an overhanging frame to slide and fall.
Achieving Visual Balance and Cohesion
To make your arrangement look cohesive, apply the concept of visual triangles. When arranging a group of three frames, position them so that their top edges form an imaginary triangle. This shape naturally guides the viewer’s eye up, across, and down the display, creating a balanced flow. You can create multiple overlapping triangles across a longer shelf to maintain interest.
Asymmetrical balance is often more appealing than perfect symmetry. Instead of mirroring the exact layout on both sides of a shelf, balance a large frame on one side with two smaller, layered frames on the other. This distributes the visual weight evenly without making the display look sterile or overly formal.
Coordinating your frame materials and borders is another highly effective way to tie different images together. If you are mixing different frame styles, try using consistent matting colors inside the frames. A uniform white or cream mat board can instantly unify a diverse collection of photos, frames, and art styles.
Color coordination within the images themselves also plays a major role in cohesion. If your photos have wildly different color schemes, consider converting them to black-and-white or sepia tones. This simple adjustment removes visual noise and allows the textures of the frames and the structure of the arrangement to take center stage.
Finally, evaluate your display from various sightlines around the room. Step back and look at the shelf from the main entrance, the primary seating areas, and different angles. A layout that looks perfect from directly in front might look flat or disjointed when viewed from the side. Adjust the angles of the frame stands slightly so they face the room’s primary gathering areas.
Adapting Arrangements for Different Surfaces
Different surfaces require unique styling adjustments to ensure both beauty and stability. Narrow floating shelves, for example, offer very limited depth, making deep easel-back stands impractical. For these shallow surfaces, look for low-profile frame stands or frames with thin, adjustable metal backings that require minimal space to stand upright.
Deep mantels and console tables, on the other hand, provide ample space for dramatic, multi-layered displays. On these deeper surfaces, you can push your anchor frames further back and create multiple layers of depth. This extra space also allows you to integrate other decorative elements alongside your frame stands.
When styling rustic or reclaimed wood shelves, you may encounter uneven surfaces or slightly sloped edges. Test the stability of each frame stand individually on these surfaces. If a stand wobbles or leans precariously, adjust its position to a flatter section of the wood, or use a small stabilizer underneath to level the base.
Integrating small, low-profile decor items can help bridge the gaps between your frame stands. Items like small ceramic vases, stacked books, or tiny potted plants can be placed between frame clusters to soften the transitions. Ensure these decorative pieces are shorter than your frames so they do not block the images or clutter the display.
Keep the scale of your decor items in proportion to your frames. A massive vase placed next to a delicate tabletop frame stand will overwhelm the photo and disrupt the visual balance. Choose accent pieces that complement the colors and materials of your frames to maintain a unified aesthetic.
Frequently Asked Questions (FAQ)
How do I keep frame stands from slipping on smooth shelves?
Smooth surfaces like glass, polished marble, or lacquered wood can cause frame stands to slide easily. To prevent this, apply a small amount of removable adhesive putty (such as museum putty) to the bottom of the stand’s base or the tip of its easel leg. Alternatively, thin, clear non-slip silicone pads can be placed discreetly under the contact points. Always check the manufacturer’s guidelines for both the putty and your shelf finish to ensure the adhesive won’t strip away paint, varnish, or wood oils. Avoid permanent glues, double-sided mounting tapes, or heavy-duty adhesives, as these can permanently damage both the shelf and the frame stand.
Can I mix different frame stand materials in one display?
Yes, mixing materials like brass, matte black metal, and natural oak can add rich texture and character to your display. To keep the arrangement cohesive, use a unifying element such as consistent matting borders or a single photographic theme across all pictures. Distribute the different materials evenly throughout the arrangement rather than clustering all the metal frames on one side and all the wood frames on the other. As a general rule, limit your selection to two or three distinct finishes to prevent the display from looking chaotic or disjointed.

Community discussion
Share your experience or ask a question. Comments are reviewed before publication.