
Creating a gallery-style wall display with your PicPak photo frames transforms an ordinary living space into a highly personalized visual narrative. To achieve a professional, balanced look, the process requires a thoughtful combination of spatial planning, precise measurement, and the correct installation techniques tailored to your specific wall type. Whether you are decorating a cozy apartment hallway or a spacious living room feature wall, taking the time to map out your arrangement ensures a cohesive result that enhances your home’s interior design.
Plan Your Gallery Wall Layout Before Drilling
Before making any permanent marks or drilling holes into your walls, you must establish a clear layout plan. A well-thought-out arrangement prevents unnecessary damage and ensures that the final display feels balanced rather than cluttered. Different layout styles offer distinct visual effects, and choosing the right one depends on your personal aesthetic and the variety of frame sizes you have.
A structured grid layout is ideal if you prefer a clean, symmetrical, and modern look. This style works best when you have multiple PicPak frames of the identical size and shape, arranged in precise rows and columns.
Products mentioned in this guide
![SG Stock [Super Offer] Wooden Photo Frame Picture Frame 4R 5R 6R 8R A4 Frame Table Wall Display Photo Frame for Home Office Art Display Christmas Gift Teachers Day Gift](https://img.lazcdn.com/g/p/bb9e605bbbce2ca17e8b17e2edb1a478.jpg_400x400q80.jpg_.webp)
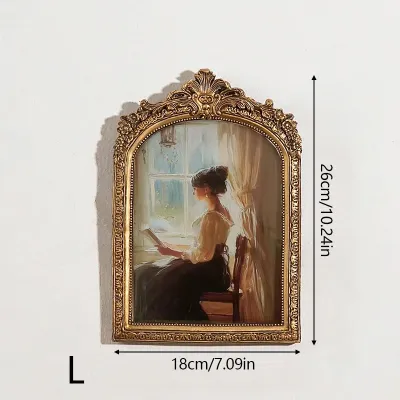


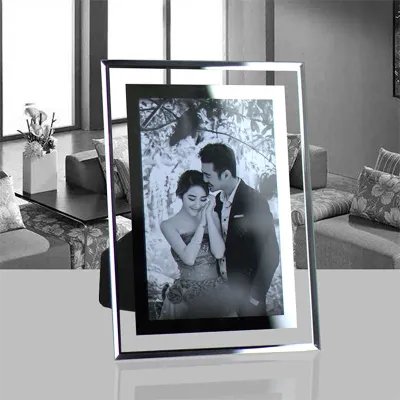
Prices are valid at publication and may change. Please refer to the product page for the latest price.
For a more relaxed and dynamic feel, an eclectic salon layout allows you to mix different frame sizes, orientations, and even colors. This organic arrangement grows outward from a central focal point, making it highly adaptable for expanding collections over time.
A linear alignment layout organizes frames along a single horizontal or vertical axis. You can align either the top edges, bottom edges, or the exact centers of the frames along an imaginary line. This approach is excellent for narrow spaces like hallways or staircases, as it guides the eye smoothly along the wall.
To visualize these layouts without damaging your walls, create paper templates of each PicPak photo frame. Trace the outline of each frame onto brown kraft paper or newspaper, cut them out, and label them with the corresponding photo. Use low-tack painter’s tape to stick these paper templates onto your wall, allowing you to experiment with different configurations and spacing.
When arranging your templates, aim for consistent spacing between the frames to maintain visual harmony. A standard gap of 5 cm to 8 cm between frames is generally recommended for residential spaces. If your frames are exceptionally large, you may want to increase this spacing slightly to give each piece room to breathe, whereas smaller frames benefit from tighter spacing to keep the collection cohesive.
Step back frequently during this planning phase to view the arrangement from different angles and distances within the room. Check that the overall shape of the gallery wall complements the surrounding furniture and architectural features. Once you are completely satisfied with the visual balance and alignment of the paper templates, you can proceed to the installation phase with confidence.
Gather the Right Tools for Your Wall Type
Having the correct tools and hardware on hand is essential for a safe, secure, and damage-free installation. The specific equipment you need depends heavily on the construction of your walls and the weight of your PicPak photo frames. Preparing these items beforehand ensures a smooth workflow and prevents mid-project trips to the hardware store.

Begin by gathering your measuring tape, pencil, and a high-quality spirit level. These basic tools are essential for calculating precise distances, marking placement points, and ensuring that every frame hangs perfectly straight to maintain a clean visual flow.
Next, inspect the back of each PicPak photo frame to identify its specific hanging mechanism. Common mechanisms include sawtooth hangers, D-rings, or hanging wires. The type of hanger determines the kind of wall hook or screw you will need to secure the frame properly.
Understanding your wall material is critical for selecting the appropriate mounting hardware and preventing structural damage. In many modern residential buildings, particularly high-rise apartments, walls are constructed from solid concrete or masonry. Hanging frames on concrete requires a masonry drill bit, plastic wall plugs (anchors), and matching screws to ensure a secure hold.
If you are working with internal partition walls, they are likely made of drywall or gypsum board. Drywall installations require specialized hollow-wall anchors or toggle bolts that expand behind the board to distribute the weight safely. For lightweight frames, simple picture-hanging hooks with angled nails may suffice, but always verify the weight capacity of the hardware before proceeding.
Never attempt to use standard nails or adhesive strips on heavy frames or textured plaster walls without verifying their compatibility. In humid climates, adhesive-based hanging solutions can lose their grip over time, potentially causing your frames to fall and sustain damage. Choosing mechanical fasteners like screws and anchors remains the safest and most reliable method for long-term displays.
Step-by-Step Guide to Hanging Your PicPak Frames
With your layout planned and your tools gathered, you are ready to begin the physical installation. Following a systematic, step-by-step process ensures that your frames are mounted securely and precisely where you intended. Take your time with each step to avoid alignment errors.
Start by working directly with your paper templates that are already taped to the wall. To mark the exact spot where the nail or screw needs to go, you must calculate the drop length of the frame’s hanging mechanism. Measure the distance from the top edge of the physical frame to the point where the hanger will rest on the hook or nail when suspended.
Transfer this measurement onto your paper template by measuring down from the top edge of the paper and marking the spot with a pencil. This mark represents the precise location for your wall anchor or nail. Double-check this measurement for each frame, as hanging mechanisms can vary slightly even among frames of the same size.
For concrete walls, use an electric drill with a masonry bit matching your wall plugs. Drill perpendicular to the wall, insert the plastic plug flush with the surface, and tighten the screw, leaving a small portion protruding to catch the frame’s hanger.
For drywall installations, tap the self-drilling drywall anchor into your marked spot using a screwdriver or drill until it is flush, then secure the screw. If you are using simple picture hooks on drywall, place the hook directly over your pencil mark and tap the angled nail gently into the wall with a hammer. Always wear safety glasses when drilling or hammering to protect your eyes from dust and debris.
If you encounter unexpected resistance while drilling, or if the wall material feels unusually crumbly and unstable, stop immediately. This resistance could indicate that you have hit a metal stud, rebar, or an electrical conduit. In such cases, shift your layout slightly or consult a professional to avoid damaging your home’s utility lines.
Once your hardware is securely in place, carefully remove the paper template from the wall and hang your PicPak photo frame onto the hook or screw. Place your spirit level on top of the frame to check for straightness. Gently adjust the frame left or right until the bubble in the level sits perfectly between the two center lines.
Repeat this process for each frame in your gallery wall, working from the center of your layout outward. By installing the central pieces first, you establish a stable anchor point for the rest of the arrangement. Regularly step back to verify that the spacing between the newly hung frames matches your original paper layout.
Fine-Tune and Maintain Your Gallery Display
After hanging all your PicPak photo frames, a few final adjustments will ensure your gallery wall remains pristine and secure over time. Minor shifts can occur during the hanging process, and environmental factors can affect the stability of your display. Taking steps to secure and maintain the frames preserves your hard work.
To prevent your frames from shifting or scratching the wall, apply small adhesive rubber bumpers or a tiny dab of museum putty to the bottom corners of each frame. This keeps them firmly in place during routine cleaning and allows air to circulate behind the frames, which is highly beneficial in humid environments to prevent moisture buildup.
Routine maintenance is essential for keeping your gallery wall looking its best. Dust your frames regularly using a soft, dry microfiber cloth to prevent buildup on the glass and borders. Avoid spraying liquid glass cleaners directly onto the frames, as moisture can seep behind the glass and damage your photographs; instead, spray a small amount of cleaner onto your cloth first.
Periodically inspect the stability of your hanging hardware, especially if you live in an area prone to vibrations or high humidity. Check that the wall plugs remain tight and that the frames do not wobble when touched. If you notice any loose hardware, remove the frame immediately and reinstall the anchor securely.
For complex installations, such as arranging frames along a high-ceilinged staircase, mounting exceptionally heavy custom-framed pieces, or dealing with delicate historical plaster walls, it is wise to seek professional assistance. A qualified handyman or professional art installer has the specialized tools and experience to handle challenging environments safely. Prioritizing safety ensures that your beautiful gallery wall remains a source of joy rather than a hazard.
Frequently Asked Questions (FAQ)
How high should I hang my gallery wall?
As a general rule of thumb, the center of your gallery wall display should hang at eye level, which is approximately 140 cm to 150 cm from the floor. If you are arranging a collection of frames, treat the entire grouping as a single large artwork and aim to position the center of the overall layout at this height. When hanging frames above furniture like a sofa, console table, or bed, ensure there is a clearance of 15 cm to 20 cm between the bottom of the lowest frame and the top of the furniture to prevent accidental bumps.
Can I mix different PicPak frame sizes and colors?
Yes, mixing different sizes and colors of PicPak photo frames can create a visually engaging and personalized gallery wall. To keep the arrangement from looking chaotic, establish at least one unifying element across the display, such as using consistent white matting for all your photos or sticking to a coordinated color palette. Balance the visual weight by placing larger or darker frames toward the bottom or center of the layout, and surround them with smaller, lighter frames to maintain a sense of equilibrium.

Community discussion
Share your experience or ask a question. Comments are reviewed before publication.