
Choosing the right acrylic photo frame style requires balancing the visual weight of your artwork with the architectural character of your room. Unlike traditional wooden or metal borders, acrylic frames offer a unique interplay with light, transparency, and depth. In Singapore’s bright, humid climate, acrylic is an exceptionally practical choice because it does not warp or degrade under high humidity. By matching the frame’s mounting style, edge finish, and transparency to your specific art medium, you can create a cohesive gallery look that elevates your entire living space.
Assess Your Space and Wall Art Aesthetic
To select the ideal frame, first evaluate the dominant design themes, color palettes, and lighting conditions of your room. Modern Singapore apartments, such as newly renovated BTO flats, often feature clean lines, neutral tones, and abundant natural light. If your room features minimalist furniture with light oak or white finishes, a heavy, dark frame might disrupt the visual flow. Instead, a frameless or clear acrylic style preserves the airy, open feel of the room while keeping the focus entirely on the artwork.
Consider how your room’s lighting interacts with acrylic surfaces. Rooms with large windows receive intense daylight that can cause glare on glossy panels, while spaces relying on recessed warm LED downlights require frames that do not cast distracting shadows. Observing how light moves across your designated wall throughout the day will help you decide between a high-gloss polished edge or a soft matte finish.
Products mentioned in this guide
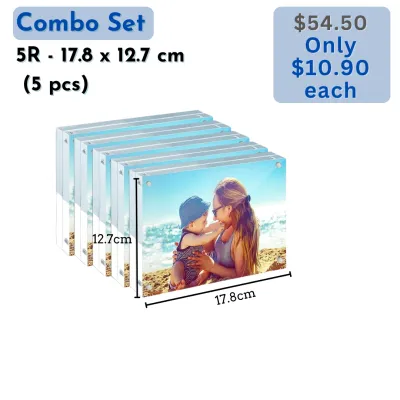


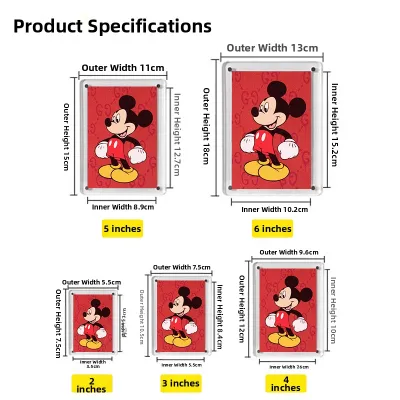
Prices are valid at publication and may change. Please refer to the product page for the latest price.
Next, determine the visual weight and focal point of your current wall art. A large, vibrant abstract painting demands a different framing approach than a delicate, monochrome line drawing. If the artwork is meant to be the absolute centerpiece of the room, the frame should act as a quiet supporter rather than a competitor. For eclectic spaces filled with mixed textures, mid-century modern furniture, and bold accent walls, you might opt for a frame style that introduces a playful pop of color or a dramatic floating effect to match that energetic aesthetic.
Understand Popular Acrylic Frame Designs
Acrylic frames come in several distinct designs to suit different presentation styles. Clear, edge-polished frames are the classic choice for a seamless, gallery-like look. These frames typically consist of two solid acrylic panels that sandwich the artwork, held together by low-profile metal standoffs. The polished edges catch and refract light, creating a subtle, luminous border around the image.

Floating acrylic frames leave a clear margin of space around the edges of the artwork, allowing the wall color and texture to show through. This design makes the art appear suspended in mid-air. The depth created by the metal standoffs—which mount the frame slightly away from the wall—adds a three-dimensional quality, casting soft shadows that shift beautifully as the room’s lighting changes.
Coloured or tinted acrylic frames offer an exciting alternative to completely clear panels. These frames feature neon, pastel, or smoky translucent borders that frame the artwork with a vibrant halo of color. When light passes through the tinted edges, it projects a soft glow onto the wall, making this style highly effective for contemporary prints and graphic designs.
The choice between a matte and a glossy finish is another critical design decision. Glossy acrylic panels maximize clarity and color saturation, making photographic prints look incredibly sharp and vibrant. However, they are highly reflective and can act like mirrors in brightly lit rooms. Matte acrylic, often referred to as non-glare acrylic, features a lightly textured surface that diffuses light reflection. While matte finishes significantly reduce glare, they can slightly soften the contrast and sharpness of the image, making them best suited for rooms with intense overhead lighting or direct sunlight.
Match Frame Styles to Specific Art Types
Pairing the right acrylic frame style with your specific art medium ensures that neither element overpowers the other. Minimalist and completely clear frames are highly compatible with modern photography, architectural prints, and delicate line art. Because these art styles rely on clean lines and negative space, a borderless clear frame maintains their quiet elegance. This combination works exceptionally well in contemporary living rooms or home offices where a cluttered look must be avoided.
Floating frames are the ideal match for canvas prints, thick handmade paper, or pieces with deckled edges. Hiding textured edges behind a traditional mat board robs the artwork of its organic character. Suspending the textured paper between two clear acrylic sheets with a generous clear border highlights the physical craftsmanship of the paper, emphasizing its three-dimensional quality.
Tinted or coloured acrylic frames are perfect for eclectic interiors or rooms that embrace bold color blocking. Pairing a vibrant pop art print with a complementary tinted frame—such as a neon orange or smoky grey border—amplifies the artwork’s energy. This approach works best when the frame’s tint coordinates with an existing accent color in your room, such as a throw cushion or a painted feature wall.
Balancing the visual weight of your display requires careful consideration of the frame’s thickness, the artwork’s dimensions, and the color of the wall. A small print framed in a very thick, heavy acrylic panel can look disproportionate, while a massive poster framed in thin, flexible acrylic may bow or look cheap. As a general rule, larger artworks require thicker acrylic panels to maintain structural rigidity and a premium appearance. Additionally, if you are mounting a clear frame on a dark or patterned wallpaper, ensure the artwork has enough contrast to stand out against the background showing through the clear borders.
Check Practical Specifications Before Buying
Before purchasing any acrylic frame, you must verify its physical specifications to ensure a safe and successful installation. Start by checking the exact dimensions, acrylic thickness, and weight limits specified by the manufacturer. High-quality acrylic frames are typically made from cast acrylic rather than extruded acrylic, as cast acrylic offers superior optical clarity and is less prone to yellowing over time. Ensure the thickness of the panels is sufficient to prevent warping, especially for frames larger than A3 size.
Reviewing mounting hardware compatibility is crucial for different wall materials. In Singapore, many residential walls—especially in HDB flats—are made of solid concrete rather than hollow drywall. Mounting a heavy acrylic frame onto concrete requires appropriate masonry drill bits, plastic wall plugs, and sturdy screws. If you are renting and cannot drill holes, verify if the frame’s weight is compatible with high-strength adhesive hanging strips, though mechanical fastening is always recommended for heavier panels.
Environmental factors should also influence your technical choices. If your artwork is a valuable original painting, a limited-edition print, or a cherished family photograph, standard acrylic may not provide sufficient protection against fading. Look for specialized acrylic frames that feature UV-blocking properties, which can filter out harmful ultraviolet rays from both sunlight and fluorescent indoor lighting. Additionally, if the frame will be positioned directly opposite a window, prioritizing an anti-glare coating will ensure your art remains clearly visible at all times of the day.
Finally, always review the manufacturer’s care and maintenance instructions before making a purchase. Acrylic is highly durable and shatterproof compared to traditional glass, making it an excellent choice for households with children or pets. However, it is significantly softer than glass and can scratch easily if handled incorrectly. Understanding the specific cleaning requirements and material limitations of your chosen frame will help you preserve its pristine, crystal-clear appearance for years to come.
Step-by-Step Guide to Hanging and Styling
Executing a visually balanced and secure installation requires a methodical approach. Begin by planning your layout on the floor or by cutting out paper templates that match the exact dimensions of your acrylic frames. Tape these paper templates to your wall using low-tack painter’s tape. This step allows you to step back and evaluate the height, spacing, and overall composition of your display without making permanent marks or drilling unnecessary holes in your walls.
Once you are satisfied with the layout, use a pencil to mark the exact hanging points through the templates. For acrylic frames that use metal standoff mounts, you will need to mark the center of each of the four corner barrels. Use a spirit level to ensure that your markings are perfectly horizontal and vertical. Even a minor misalignment of a few millimeters can be highly noticeable with frameless acrylic designs, as their clean, straight edges offer no visual forgiveness against crooked lines.
Next, prepare your tools and install the correct wall anchors. For concrete walls, drill holes using a masonry drill bit, insert the plastic wall plugs flush, and screw the base barrels of the standoffs securely into place. If you are working with drywall, utilize specialized self-drilling drywall anchors. For heavy frames, work at height, or complex installations, always follow the manufacturer’s precise instructions or consult a qualified professional installer to ensure the suspended load is safely secured.
After the installation is complete, you will likely find fingerprints or static dust on the acrylic surface. Clean the frame using a clean, dry, high-quality microfiber cloth. Avoid using standard paper towels, tissue paper, or old cotton rags, as their fibers can trap microscopic dirt particles and cause fine scratches on the soft acrylic surface. Wipe the panels gently in straight, light strokes rather than circular motions to maintain a flawless, gallery-grade finish.
Frequently Asked Questions (FAQ)
How do I clean acrylic photo frames without scratching them?
To clean your acrylic frames safely, always use a clean, ultra-soft microfiber cloth paired with a dedicated acrylic cleaner or a mild solution of warm water and a drop of gentle dishwashing liquid. Never use paper towels, kitchen sponges, or dry polyester cloths, as these materials can create micro-scratches that dull the surface over time. Additionally, strictly avoid any cleaning products containing ammonia, alcohol, or solvents—such as standard glass cleaners—as these chemicals can cause the acrylic to develop tiny internal cracks, a process known as crazing.
Can acrylic frames protect my art from UV damage?
Standard acrylic frames naturally block a small percentage of ultraviolet (UV) light, but they do not offer complete protection for highly sensitive or valuable artwork. If your art will be exposed to direct sunlight or bright ambient daylight, you should look for frames specifically labeled as UV-filtering or conservation-grade acrylic, which typically block 99% of harmful UV rays. Always check the manufacturer’s product specifications and labels to verify the exact UV protection level before purchasing, ensuring your prints and photographs are safe from fading and discoloration.

Community discussion
Share your experience or ask a question. Comments are reviewed before publication.