
Choosing the right light adapter requires matching three critical dimensions: the physical socket type, the electrical capacity (wattage and voltage), and the spatial constraints of your fixture. A light adapter acts as a bridge, allowing you to fit a bulb with one base type (such as an E27 screw) into a fixture designed for another (such as a B22 bayonet socket). While these accessories offer excellent convenience, they introduce electrical and physical variables that must be managed carefully. Ensuring safety and performance means checking compatibility thoroughly before making a purchase.
Identify Your Bulb Base and Fixture Socket
To find the right adapter, you must first identify the mechanical interface of both your existing light fixture and the bulb you intend to use. In Singapore, residential properties feature a mix of British and international standard fittings, which can make bulb replacement confusing.
E27 Edison Screw: This is the most common screw-type base, measuring 27mm in diameter. It is widely used in modern pendant lights, wall lamps, and floor fixtures. If you are transitioning to smart home lighting, you will find that the vast majority of smart bulbs utilize this base.
Products mentioned in this guide
Prices are valid at publication and may change. Please refer to the product page for the latest price.
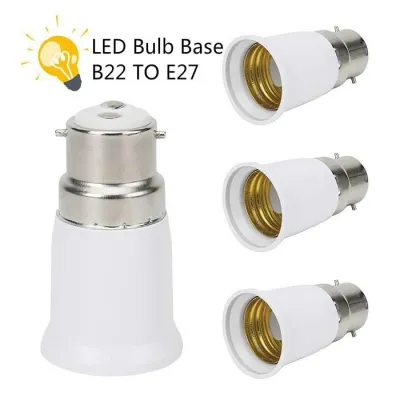
B22 Bayonet Cap: Often found in older HDB flats and traditional fixtures, this base features two radial pins on opposite sides that push and twist into slots. It measures 22mm in diameter. Because many modern LED designs favor the E27 screw, B22-to-E27 adapters are incredibly popular for upgrading older rooms without replacing the entire fixture.
GU10 Twist-and-Lock: Commonly utilized in directional spotlights and track lighting, this base has two thick pins that lock into place with a quarter-turn. It is designed for mains-voltage directional lighting.
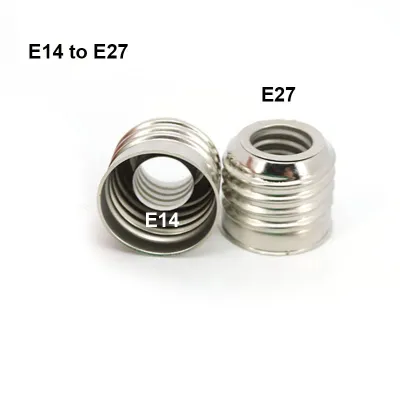
E14 Small Edison Screw: Measuring 14mm in diameter, this smaller screw base is typical in chandeliers, decorative table lamps, and appliance lighting.
To confirm your socket type, inspect the interior of the fixture when the power is completely off. Look for threads (Edison screw), slot channels (bayonet), or pin holes (GU10).
An adapter is an ideal solution when you have high-quality bulbs on hand—such as smart bulbs or specialized decorative filaments—that do not match your fixture’s socket. However, if you are buying standard LED bulbs from scratch, purchasing a bulb with the correct native base is always the safer, cleaner, and more reliable choice.
Verify Wattage, Voltage, and Electrical Safety
Electrical compatibility is paramount to prevent overheating, short circuits, or fire hazards. Every light fixture has a maximum wattage rating, which is typically printed on a label inside the socket cup or on the fixture body. Always check the applied product’s label and the treated item’s manufacturer instructions before installation.

The fundamental safety rule is that the power consumption of your bulb must never exceed the maximum wattage rating of either the light fixture or the light adapter. When using an adapter, you must adhere to the lowest rating among all three components.
Modern LED bulbs draw significantly less power than older incandescent or halogen bulbs. For example, a 9W LED can produce the same light output as a 60W incandescent bulb. However, you must calculate electrical loads based on actual power draw (wattage), not equivalent brightness. If you are using vintage filament bulbs or high-power halogen bulbs, verifying these limits is critical because adapters are often made of plastic or ceramic with strict thermal thresholds. Plastic adapters can warp or melt if exposed to the high heat generated by older incandescent bulbs.
In Singapore, the standard mains electricity supply is 230V at 50Hz. Ensure your adapter is rated for 230V mains voltage. Be extremely cautious with low-voltage systems, such as 12V MR16 halogen downlights. You cannot use a simple passive adapter to run a 230V mains bulb in a 12V socket, or vice versa, without a compatible transformer or driver. Attempting to bypass these requirements can destroy the bulb or damage your home’s electrical wiring.
When purchasing a light adapter, look for recognized local safety marks or international electrical certifications on the packaging. In Singapore, controlled goods must carry the Safety Mark issued by Enterprise Singapore. Avoid unbranded, ultra-cheap adapters from online marketplaces that lack clear safety labeling, as poor-quality internal contacts can lead to electrical arcing.
Check Physical Clearance and Fixture Constraints
Even if an adapter is electrically safe and matches your socket, it may not fit physically. A light adapter adds physical length and sometimes width to the overall bulb assembly.
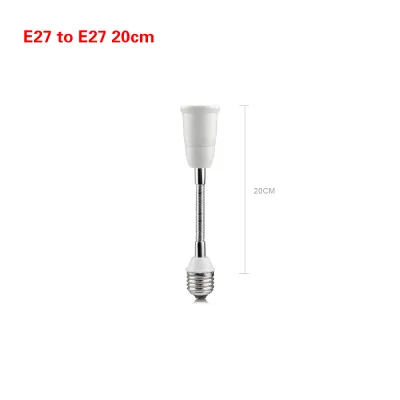
Protrusion and Enclosure Limits: Inserting an adapter pushes the bulb further out of the socket, typically by 2 to 4 centimeters. In recessed downlights, flush-mount ceiling fixtures, or glass globe shades, this extra height can cause the bulb to press against the glass or protrude awkwardly. This not only ruins the aesthetic but can also trap heat inside enclosed fixtures, shortening the lifespan of both the bulb and the adapter.
Dimmer Compatibility: Standard passive adapters do not alter the electrical signal. If your fixture is connected to a wall dimmer switch, compatibility depends entirely on the bulb and the dimmer itself. However, cheap adapters with loose internal connections can disrupt dimming signals, causing flickering. If you are installing smart bulbs, they require a constant, un-dimmed power supply; using them with manual dimmers or through complex adapter chains can damage their internal circuitry.
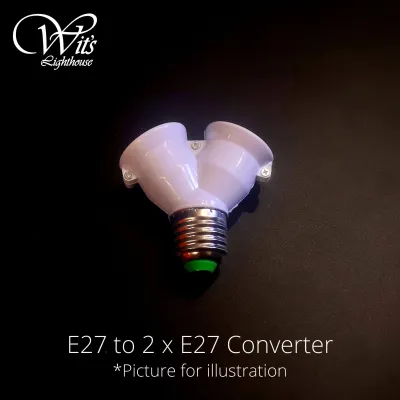
Weight and Structural Limits: Some adapters are designed to split one socket into multiple bulbs (such as a 1-to-3 E27 splitter). This significantly increases the weight suspended from the fixture. Ensure your fixture’s mounting bracket, suspension cord, or socket assembly can support this extra load. Aging, brittle plastic sockets or delicate pendant cords can crack or snap under excessive weight, creating a physical and electrical hazard.
How to Safely Install the Light Adapter
Installing a light adapter is a straightforward task, but it requires strict adherence to electrical safety protocols to avoid shocks or damage.
Preparation: Before touching any part of the fixture, turn off the power. Do not rely solely on the wall switch. Switch off the dedicated circuit breaker at your home’s main distribution board (DB box) to ensure the circuit is completely dead.
Inspection: Carefully remove the existing bulb if one is present. Inspect the interior of the socket using a torch. Check for accumulated dust, debris, corrosion, or signs of heat damage such as brown or black scorch marks. If the socket is dirty, wipe it gently with a dry microfiber cloth while the power is off.
Installation: Align the adapter with the fixture socket. For Edison screw sockets, screw the adapter in clockwise until it is snug. For bayonet sockets, push the adapter in and twist it clockwise until it locks into the slots. Avoid over-tightening, as excessive force can crack the adapter’s casing or flatten the metal contact tabs inside the socket, preventing a proper electrical connection.
Bulb Seating: Once the adapter is securely in place, install your target bulb into the adapter. Follow the same careful screwing or twisting motion, ensuring the bulb sits straight and flush.
Testing: Step back from the fixture, restore power at the main circuit breaker, and turn on the wall switch. The bulb should light up instantly without flickering or buzzing.
Stop Condition: If you encounter any resistance during installation, if the adapter feels loose or wobbles, or if you notice sparks, a burning smell, or buzzing when you turn the power back on, turn off the breaker immediately. Do not attempt to force the connection or use a damaged socket. Under these conditions, stop the installation and consult a licensed electrical worker or qualified professional to inspect your home’s wiring.
Test and Troubleshoot the Connection
If your newly adapted light does not function perfectly, you can perform a few safe troubleshooting steps to identify the issue.
Flickering or Intermittent Power: This is usually caused by a loose connection. Turn off the power at the circuit breaker and wait for the bulb to cool. Check if the bulb is fully seated within the adapter, and verify that the adapter itself is firmly screwed or locked into the fixture socket. If the metal contact tabs inside an older socket have flattened over time, they may not touch the adapter’s contacts properly; a qualified electrician can adjust or replace these sockets safely.
Buzzing Sounds: A distinct buzzing or humming noise typically points to a dimmer compatibility issue or a failing component. If you are using an LED bulb on an older leading-edge dimmer switch, the mismatched electrical frequency can cause physical vibrations in the bulb’s driver. Turn off the power immediately and remove the setup. Replacing the dimmer switch with an LED-compatible trailing-edge model, or switching to a non-dimmable circuit, usually resolves this issue.
Bulb Not Turning On: If the bulb fails to light up entirely, isolate the problem by testing the bulb in a known working socket without the adapter. If the bulb works, the adapter may be defective, or the fixture’s internal wiring might be faulty. Verify that the wall switch and circuit breaker are fully operational before replacing any parts.
Frequently Asked Questions (FAQ)
Can I use a standard light adapter in an outdoor or damp fixture?
Standard indoor light adapters are not designed to withstand moisture, high humidity, or direct water exposure. They lack the rubber gaskets and weatherproofing seals required to keep water out of the electrical contacts. In Singapore’s humid climate, using an indoor adapter in an outdoor patio, balcony, or bathroom fixture can lead to short circuits, corrosion, and electrical hazards. Always verify the Ingress Protection (IP) rating of both your fixture and the adapter. For damp or outdoor locations, ensure the entire assembly is rated at least IP44 or higher, or consult a professional to install a dedicated weatherproof fixture.
Do light adapters affect the brightness or color temperature of the bulb?
No, high-quality passive mechanical adapters do not alter the electrical current, brightness (lumens), color temperature (Kelvins), or beam angle of the bulb. The light quality depends entirely on the specifications of the bulb you install. However, a low-quality adapter with poor internal metal contacts can create electrical resistance. This resistance can cause voltage drops, leading to flickering, reduced light output, or excessive heat generation at the contact points. Investing in certified, well-constructed adapters ensures your bulb performs exactly as the manufacturer intended.

Community discussion
Share your experience or ask a question. Comments are reviewed before publication.