
Selecting the right wall painting light for your corridor involves balancing the physical dimensions of your hallway with the scale of your artwork and the technical specifications of the fixture. In homes with standard corridor widths, finding a light that provides focused illumination without obstructing the walkway or causing uncomfortable glare is key to creating an inviting transition space. By measuring your corridor’s width, calculating safe clearance profiles, and matching the light’s lumen output to your specific display needs, you can achieve a balanced, professional-looking gallery effect.
Assessing Your Corridor Dimensions and Lighting Needs
Before browsing fixture designs, establish the physical boundaries of your corridor. Measure the exact wall-to-wall width at several points along the hallway, as structural columns can cause slight variations. Note the ceiling height from the floor, which determines how high you can mount the fixture while keeping the light source out of your direct line of sight. Additionally, measure the length of the corridor to plan the overall layout and determine if a single light or a series of fixtures is required.
Identifying potential glare zones is crucial for maintaining visual comfort in a transitional space. Corridors are often narrow, meaning you will view the wall painting light from various angles as you walk past. Look for highly reflective surfaces, such as glossy wall paint, polished marble flooring, or glass-fronted picture frames, which can bounce harsh light directly into your eyes. If your corridor features direct sightlines from adjacent bedrooms, position the fixtures so the bare bulbs or intense LED arrays are shielded from these viewpoints.
Products mentioned in this guide
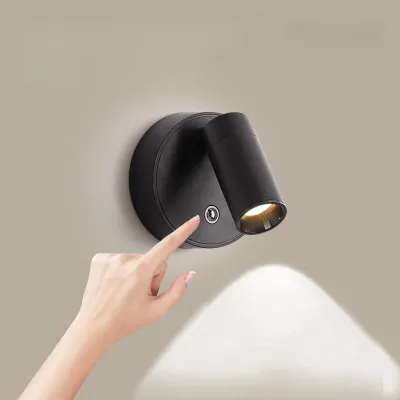
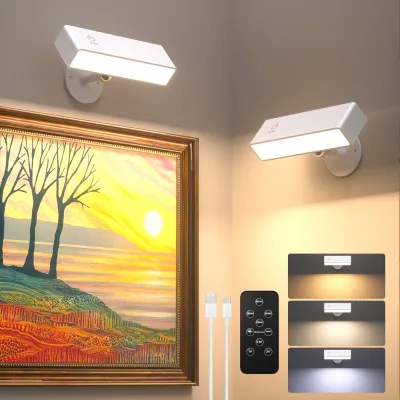
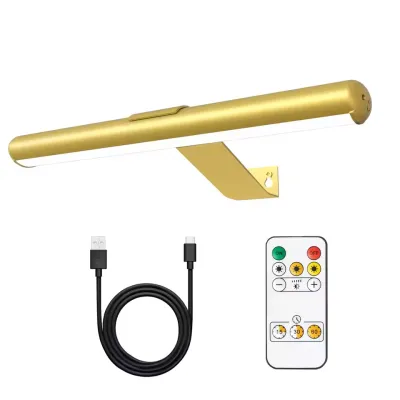
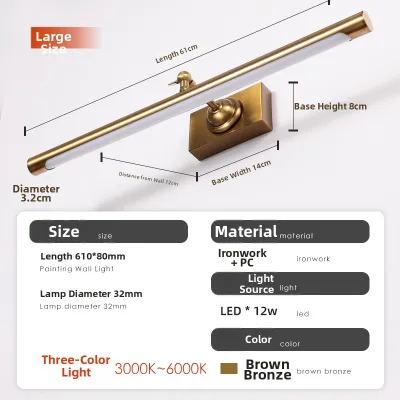
Prices are valid at publication and may change. Please refer to the product page for the latest price.
Locating existing junction boxes or electrical points is another essential preparatory step. In many concrete-walled apartments, retrofitting electrical wiring requires surface-mounted trunking or extensive hacking, which can alter your aesthetic plans. Check the structural composition of your walls—whether they are solid concrete, brick, or hollow drywall—as this affects the type of wall anchors required and the ease of routing new cables. Verifying these structural constraints early prevents compatibility issues later.
Matching Wall Painting Light Size to Corridor Width
When choosing a wall painting light, the fixture’s protrusion—how far it extends from the wall—is a critical safety and comfort factor. In a narrow corridor, a fixture that sticks out too far can become a physical hazard, catching on clothing or obstructing the passage of furniture. For hallways with a width of 100 cm or less, prioritize slim-profile or low-profile fixtures that extend no more than 10 to 15 cm from the wall surface. This ensures that the walkway remains clear and safe for daily traffic.

The width of your corridor also dictates the appropriate visual scale of the fixture. In tight, narrow spaces, compact or flush-mount wall painting lights prevent the area from feeling cramped. These designs provide targeted illumination downward or upward without dominating the wall space. Conversely, if you are blessed with a wide hallway of 120 cm or more, you have the flexibility to select larger, more decorative statement pieces or wider picture lights that span a significant portion of the artwork, creating a grander gallery feel.
Beyond physical measurements, consider the visual weight and height of the fixture in relation to the corridor’s scale. A bulky, heavy-looking brass fixture can overwhelm a narrow hallway with a low ceiling, making the space feel smaller than it actually is. To prevent an overcrowded appearance, match the fixture’s finish and bulk to the frame of the painting and the surrounding wall color. A minimalist, linear LED wall painting light often works best in modern, compact corridors, while more ornate designs require the breathing room of a spacious hallway.
Determining the Right Brightness and Beam Angle
Estimating the correct brightness for your corridor lighting requires looking at both the ambient light levels and the specific requirements of the artwork. Rather than relying on fixed wattage recommendations, evaluate the fixture’s lumen output. For general corridor safety, a low level of ambient light is sufficient, but illuminating a painting requires a higher concentration of light on the canvas. Consider the availability of natural light during the day; a corridor that receives ample daylight may only need subtle accent lighting, whereas a windowless interior hallway will rely entirely on the wall painting light for both art appreciation and safe navigation.
The choice of beam angle determines how the light is distributed across your wall. A narrow beam angle, typically between 15 and 30 degrees, creates a dramatic spotlight effect, drawing immediate attention to a specific piece of art but leaving the surrounding wall in shadow. This is ideal for highlighting individual, high-contrast paintings. For a softer, more integrated look, a wider beam angle of 60 degrees or more allows for general ambient wall washing. This spreads the light evenly across a larger section of the wall, illuminating multiple frames and contributing to the overall brightness of the corridor.
Color temperature is a conditional preference that significantly influences the mood and spatial perception of your corridor. Warm white light, ranging from 2700K to 3000K, is highly popular for residential spaces as it creates a cozy, welcoming transition zone and complements traditional artwork and wooden frames. Cool white light, around 4000K, offers a crisp, modern aesthetic that renders colors with high accuracy, making it suitable for contemporary art galleries. Avoid extremely high color temperatures (above 5000K) in windowless corridors, as they can create a harsh, clinical atmosphere and cause visual fatigue.
Installation Clearances and Electrical Safety Checks
Before purchasing any lighting fixture, you must verify its electrical compatibility with your home’s wiring system. In Singapore, the standard domestic supply is 230V at 50Hz. Ensure that the wall painting light, its integrated LED driver, or the replaceable bulb matches this voltage. Check the base or interface type (such as GU10, E27, or integrated LED modules) and ensure the wattage does not exceed the limit specified for your existing circuit. Always look for recognized electrical safety certifications to ensure the fixture has been tested for safe domestic use.
Proper placement is essential to protect both the fixture and the people using the corridor. Maintain safe clearances from swinging doors, high-traffic corners, and potential impact zones. If a door opens into the corridor, ensure the wall painting light is mounted well outside the door’s swing path to prevent accidental collisions. Position the light at a height where it cannot be easily bumped by passing shoulders or carried items, typically around 1.8 to 2 meters from the floor, depending on your ceiling height and the position of the artwork.
While some basic fixture replacements can be performed as DIY projects, you must recognize the boundaries of safe installation. For any task involving fixed wiring, working at heights, or installing new junction boxes, always isolate the power at the main distribution board before commencing work. If your project requires routing new cables through concrete walls, making structural modifications, or installing heavy suspended loads, stop your DIY efforts immediately. Consult a licensed electrician to ensure the installation is carried out safely, legally, and in compliance with local electrical standards.
Frequently Asked Questions (FAQ)
Can I use dimmable wall painting lights in a narrow corridor?
Yes, dimmable wall painting lights are highly recommended for narrow corridors. They offer the flexibility to adjust the brightness levels based on the time of day or the desired mood. For instance, you can keep the lights bright during the evening to showcase your artwork, and dim them late at night to serve as a soft, glare-free guide light. When planning a dimmable setup, it is crucial to verify that your dimmer switch, the light’s driver, and the bulb are fully compatible. Incompatible components can lead to annoying flickering, buzzing, or premature fixture failure.
How far apart should I space multiple wall lights in a long hallway?
When installing multiple wall painting lights along a long corridor, the spacing should be planned to achieve uniform illumination without creating harsh dark spots or excessive overlap. The ideal distance depends on the fixture’s beam spread, light output, and the height of your ceiling. A wider beam angle allows for greater spacing between fixtures, while narrow spotlights require closer placement to avoid dark gaps. Before drilling permanent holes or running wires, it is highly recommended to perform a temporary test layout. Hold the fixtures against the wall at various intervals to visually assess the light distribution and ensure the spacing meets your aesthetic and functional needs.

Community discussion
Share your experience or ask a question. Comments are reviewed before publication.