
Mounting an E27 track holder onto an existing lighting track system is a highly practical way to customize your home or commercial lighting layout. By converting a standard track channel into a socket for versatile screw-in bulbs, you gain the freedom to swap out spotlights, decorative Edison bulbs, or hanging pendants without replacing the entire track. While the physical mounting process is designed for quick adjustment, ensuring electrical safety and mechanical compatibility is essential for a reliable setup.
Using an E27 track holder allows you to adapt your lighting as your interior design or functional needs change. Whether you are highlighting artwork, illuminating a kitchen island, or setting a cozy mood in a living space, understanding how to install these fixtures safely ensures your system operates efficiently and without risk.
Pre-Installation Checks and Safety Preparation
Before handling any electrical fixture, safety must be your top priority. Begin by turning off the power supply. Do not rely solely on the wall switch, as it may only break the live wire while leaving the neutral wire active, or the switch itself could be wired incorrectly. Locate your property’s main distribution board (DB box) and switch off the miniature circuit breaker (MCB) controlling the specific lighting circuit. Once the power is switched off, use a reliable non-contact voltage tester near the track channel to confirm that no residual current is flowing through the system. If you are working at height, ensure your step ladder is placed on a flat, stable surface, and never overreach while holding tools or fixtures.
Products mentioned in this guide
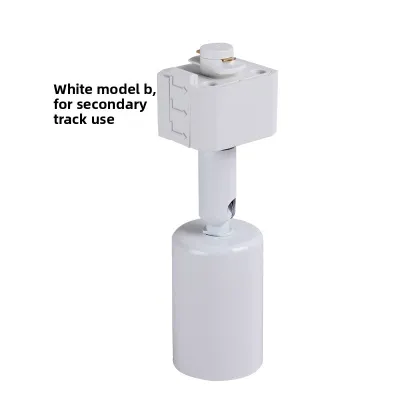
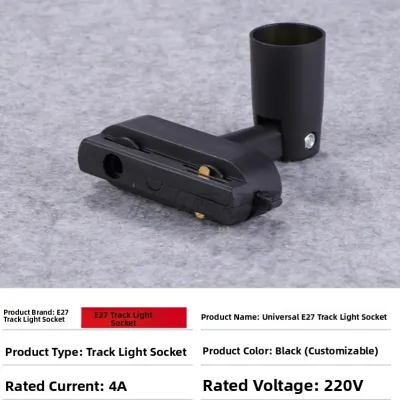
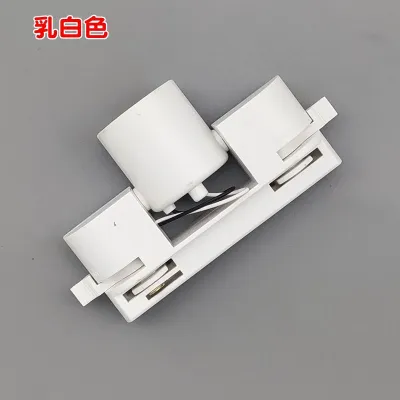
Prices are valid at publication and may change. Please refer to the product page for the latest price.
Next, verify the compatibility of your existing lighting track. Track systems are not universally interchangeable; they are categorized by their internal wiring configurations and physical profiles. The most common varieties are single-phase (often referred to as 1-phase, featuring two or three wires where all connected lights turn on and off together) and three-phase (3-phase or 4-wire systems, which allow you to control up to three separate groups of lights on the same track using different switches). Additionally, tracks conform to specific architectural standards, such as H-type, J-type, or L-type profiles. You must inspect the adapter base of your E27 track holder to ensure it matches the physical track profile and phase configuration. Attempting to force an incompatible adapter into a track can bend the internal copper busbars, crack the track casing, or cause a dangerous short circuit.
Electrical specifications must also align with local standards. In Singapore, the standard mains voltage is 230V AC at 50Hz. Ensure that both the E27 track holder and the E27 bulb you intend to use are rated for this voltage. Furthermore, pay close attention to the maximum wattage limit specified by the track holder manufacturer. While modern LED bulbs typically draw very low power (usually between 5W and 15W), some track holders may have strict thermal limits, especially when enclosed. Exceeding the rated wattage can lead to excessive heat buildup, melting of the plastic housing, and potential fire hazards. For safety assurance, look for products that carry recognized electrical certifications, such as the Enterprise Singapore Safety Mark, which indicates compliance with local safety regulations.
Before climbing the ladder, gather all necessary tools and equipment. You will need a sturdy step ladder, a non-contact voltage tester, and a clean, dry microfiber cloth to wipe down the track if dust has accumulated inside the channel. If your track holder features an adjustable pendant cord that requires fine-tuning, keep a small flat-head or Phillips-head insulated screwdriver nearby to adjust the cord grip.
Step-by-Step Guide to Mounting the Track Holder
To begin the physical mounting process, you must first understand how the adapter establishes an electrical connection. Inside the track channel, continuous copper strips (or busbars) run along the inner walls to carry the live, neutral, and earth currents. The adapter base of your E27 track holder features matching brass contact tabs. When the adapter is inserted and locked, these tabs rotate outward to press firmly against the track’s internal copper strips. Before attempting insertion, look closely at the adapter and the track channel to identify any polarity alignment features. Many track systems have a raised ridge or groove along one side of the track, and the adapter will have a corresponding notch or guide line. Proper alignment ensures that the live and neutral contacts connect to their correct counterpart strips, maintaining proper grounding and electrical safety.

Ensure the track holder’s locking mechanism is set to the fully “unlocked” position. This is typically indicated by a plastic lever, dial, or collar on the adapter base being aligned parallel to the track body. Gently insert the adapter contacts straight up into the track channel at your desired location. The adapter should slide upward smoothly without requiring significant physical force. If you encounter resistance, stop immediately. Do not try to jam the adapter into the track. Remove it and check for any physical obstructions inside the track channel, such as accumulated dust, debris, or bent copper strips, and double-check that the adapter is oriented correctly relative to the track’s polarity ridge.
Once the adapter is fully inserted and flush against the track profile, you must lock it into place to secure the mechanical and electrical connections. Hold the upper portion of the track holder steady with one hand, and use your other hand to rotate the locking lever or dial 90 degrees (usually in a clockwise direction). As you rotate the mechanism, you should feel a firm resistance followed by a distinct click or snap, indicating that the internal brass contact tabs have rotated into their active positions and locked against the copper strips. Some heavy-duty or commercial-grade adapters may also feature a sliding lock tab that must be pushed upward, or a small locking set screw that requires tightening with a screwdriver. Securing this lock is vital; a loose connection can cause electrical arcing, which generates heat, damages the track, and poses a fire risk.
The mounting technique varies slightly depending on whether you are installing a rigid spotlight adapter or a flexible pendant cord adapter. A rigid E27 spotlight holder has a short, fixed arm connecting the adapter directly to the socket. This style is easy to handle with one hand. In contrast, a pendant track holder features a flexible fabric or rubber cord that suspends the E27 socket below the track. When installing a pendant adapter, always support the weight of the hanging cord and socket with one hand to prevent it from swinging or pulling downward while you use your other hand to align and lock the adapter. This prevents unnecessary strain on the internal wiring connections during the critical locking phase.
After locking the mechanism, perform a quick stability check. Gently tug the track holder downward and slide it slightly back and forth along the track. The adapter should remain firmly anchored in place without wobbling, slipping, or showing any signs of looseness. If the holder feels unstable or slides too easily, unlock the mechanism, remove the adapter, and inspect the locking tabs for wear or damage before attempting to reinstall it.
Setting Up the E27 Bulb and Final Adjustments
With the track holder securely mounted, you can now select and install your E27 light bulb. The choice of bulb depends on your specific lighting requirements, but it must comply with the holder’s physical and electrical limitations. Ensure the bulb’s shape (such as a standard A60 globe, a decorative ST64 Edison style, or a directional PAR30 spotlight) fits comfortably within the track holder’s design. If the holder has an integrated shade, shroud, or cage, verify that the bulb has sufficient clearance and does not touch the outer housing, which could restrict airflow and cause heat to accumulate. To install, gently thread the E27 bulb clockwise into the socket. Turn it until you feel firm resistance, indicating that the bottom contact of the bulb has met the spring tab inside the socket. Avoid over-tightening, as excessive force can flatten the socket’s contact tab permanently, strip the threads, or crack the bulb’s glass envelope.
If you have installed a pendant-style E27 track holder, managing the cord length is the next step. Most pendant holders include a built-in cord grip or a small plastic set screw located at the base of the track adapter or just above the socket. Carefully loosen this grip using an insulated screwdriver, then slide the cord upward or downward through the adapter to achieve your desired hanging height. Ensure the bulb hangs at a safe distance from the floor, furniture, and any high-traffic pathways to prevent accidental collisions. Once the height is set, tighten the cord grip securely to lock the cable in place, ensuring it is tight enough to hold the weight of the fixture and bulb without pinching or damaging the outer insulation jacket.
For directional E27 track holders, such as spotlight configurations, you can now adjust the positioning to aim the light. These fixtures typically feature swiveling joints that allow for horizontal rotation and vertical tilt. Carefully adjust the angle of the holder to direct the light beam toward your specific target, whether it is a piece of artwork, a workspace, or a feature wall. If your fixture includes manual adjustment knobs or locking screws on the joints, tighten them gently to lock the angle. This prevents the spotlight from slowly drooping over time due to the weight of the bulb or the natural expansion and contraction of materials as they heat up and cool down during use.
Conclude this phase with a thorough visual inspection. Stand back and look at the installed fixture from multiple angles. Verify that the track holder hangs or sits perfectly straight, that the bulb is fully seated and aligned, and that no electrical cords or internal wires are pinched, twisted, or under tension. Ensure there are no gaps between the track adapter and the track itself, which could indicate an incomplete lock.
Testing and Basic Troubleshooting
Once you are satisfied with the physical installation and visual alignment, you can safely restore power to the system. Descend from your ladder, clear the workspace of any tools, and return to your main distribution board (DB box). Switch the miniature circuit breaker (MCB) back to the “on” position, then return to the room and turn on the wall switch or track controller to test your new light.
If the bulb fails to illuminate, do not panic. Follow a systematic troubleshooting process to identify the cause, always keeping safety in mind. First, turn off the wall switch and wait for the bulb to cool down. Check if the bulb is screwed completely into the E27 socket; sometimes, a bulb that is slightly loose will not make electrical contact. Next, verify that the track adapter itself is fully rotated and locked into the track channel. If the adapter is even slightly out of alignment, the brass contacts will not line up with the copper strips inside the track, preventing current from reaching the socket.
If the fixture still does not light up, you must isolate the components to determine where the fault lies. Unscrew the E27 bulb and test it in a known-working, standard household lamp. If the bulb lights up in the lamp, the bulb is functional, and the issue is with the track holder or the track itself. To check if the track section has power, use your non-contact voltage tester along the track channel while the wall switch is turned on. If the tester indicates that the track is live, but the track holder still fails to work with a proven bulb, the track holder’s internal contacts may be damaged or misaligned, and the unit should be replaced.
It is crucial to recognize the limits of DIY troubleshooting and prioritize safety. If you observe any sparking, smell burning plastic or ozone, experience a tripped circuit breaker immediately upon turning on the switch, or discover that the track itself lacks power and requires hardwired repairs, stop immediately. Turn off the main circuit breaker at the DB box. Do not attempt to dismantle the track, modify the internal wiring, or perform repairs on live electrical components. In Singapore, you must contact a licensed electrical worker (LEW) or a professional electrician to inspect, diagnose, and repair the system to ensure compliance with local safety regulations and prevent electrical hazards.
Frequently Asked Questions (FAQ)
Can I use a dimmable E27 bulb with my track holder?
Yes, you can use a dimmable E27 bulb, but compatibility depends on your entire system setup. The E27 track holder itself is a passive conduit that simply routes electricity from the track to the bulb socket. To dim the light successfully, you must install a dimmable E27 bulb (such as a dimmable LED) and ensure that your lighting track is wired to a compatible wall dimmer switch, such as a trailing-edge dimmer designed for LED loads. Mixing non-dimmable LED bulbs with a dimmer switch, or using an incompatible dimmer type, will result in distracting flickering, buzzing noises, and premature failure of both the bulb and the driver.
Do I need an electrician to install an E27 track holder?
No, you do not need a professional electrician simply to mount, remove, or reposition an E27 track holder on an existing, already-powered lighting track. This is a safe and simple DIY task, provided you turn off the power at the main circuit breaker before handling the fixture. However, if you need to install a new track rail, run new wiring through your ceiling, or repair a faulty track system that has lost power, Singapore regulations require a licensed electrical worker (LEW) to perform the hardwiring. This ensures that the installation complies with local electrical safety standards and prevents hazardous wiring errors.

Community discussion
Share your experience or ask a question. Comments are reviewed before publication.