
To achieve a safe, reliable, and flicker-free linear lighting setup, you must match your LED strip driver to the specific electrical requirements of your LED tape. An LED strip driver—often referred to as an LED power supply or transformer—acts as the heart of your installation, translating household alternating current (AC) into the steady low-voltage direct current (DC) that light-emitting diodes require. Getting this pairing wrong can lead to immediate equipment damage, poor light output, or even electrical safety hazards.
Matching a driver involves two non-negotiable steps: selecting the exact matching voltage and calculating a wattage capacity that includes a safety buffer. This guide walks you through the exact calculations, voltage checks, and structural planning required to ensure your lighting remains stable, bright, and safe for years to come.
Why Voltage and Wattage Matching Matters
An LED strip driver serves as a crucial intermediary between your home’s high-voltage electrical grid and the sensitive semi-conductors inside the LED strip. Unlike traditional incandescent bulbs that run directly on mains power, LEDs are highly sensitive to voltage fluctuations and require a regulated, low-voltage DC feed to operate safely.
Products mentioned in this guide
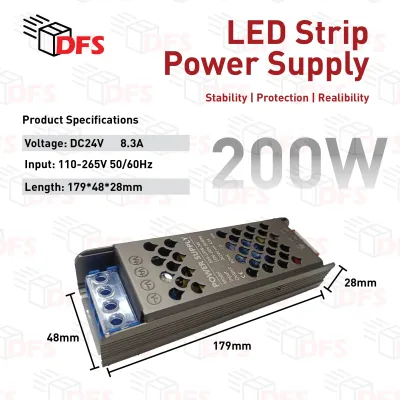
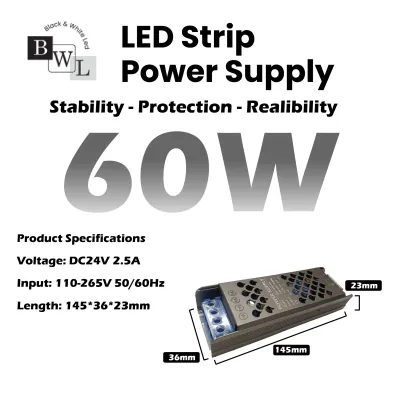
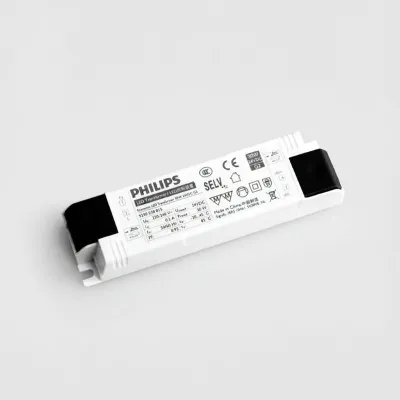
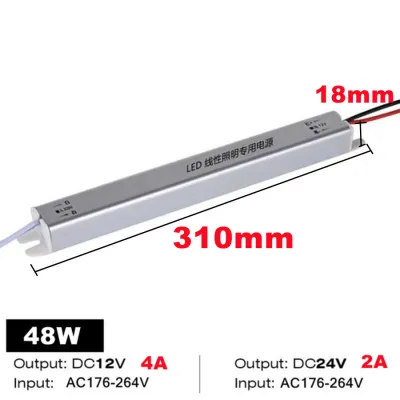
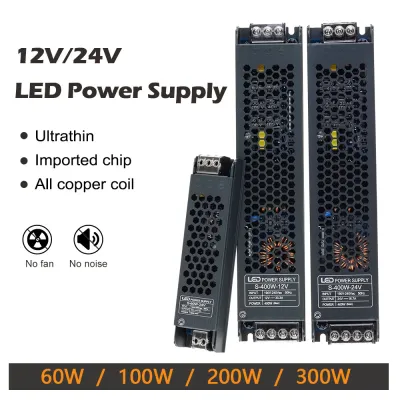
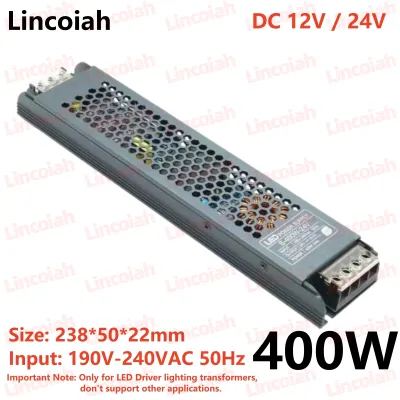
Prices are valid at publication and may change. Please refer to the product page for the latest price.
If you supply the wrong voltage to your LED strip, the consequences are immediate. Connecting a low-voltage strip to a driver with an output that is too high will instantly burn out the diodes, rendering the entire strip useless and posing a significant risk of electrical fire. Conversely, providing too little voltage will result in a strip that either fails to light up entirely or glows so dimly that it serves no functional purpose.
Mismatched wattage, while less instantly destructive than incorrect voltage, creates severe long-term performance issues. Under-specifying your driver’s wattage forces the unit to work at its absolute limit, leading to rapid heat buildup, audible buzzing, and frequent flickering. Over time, this thermal stress degrades the internal capacitors of both the driver and the LEDs, causing premature system failure.
Step 1: Match the Output Voltage of Your LED Strip Driver Exactly
Before looking at power capacity, you must identify the exact operating voltage of your LED strip. Most flexible LED strips designed for residential and light commercial use run on constant voltage systems, typically either 12V DC or 24V DC. You can find this specification printed directly on the copper solder pads of the strip itself, or detailed on the manufacturer’s product label.

The rule for voltage matching is absolute: a 12V LED strip requires a 12V DC driver, and a 24V LED strip requires a 24V DC driver. There is no room for compromise or adjustment here. Attempting to run a 12V strip on a 24V driver will destroy the strip within seconds, while running a 24V strip on a 12V driver will result in virtually no light output.
When inspecting an LED strip driver, it is vital to distinguish between its AC input and DC output specifications. The input label indicates the mains voltage the driver accepts from your wall outlets or hardwired connections. The output label indicates the low-voltage DC power delivered to the LEDs. Always verify that the driver’s DC output voltage matches your strip’s rated voltage before making any physical connections, and ensure you isolate the mains power supply at the distribution board before handling any wiring.
Step 2: Calculate the Required Driver Wattage
Once you have confirmed the voltage, you must calculate the total power consumption of your installation to select a driver with adequate wattage. LED strips consume a specific amount of power per unit of length, which is usually expressed in watts per meter (W/m) on the product packaging or specification sheet.
To find the total power draw of your system, multiply the strip’s wattage rating per meter by the total length of the strip you plan to install. For example, if you are installing a 5-meter run of an LED strip that draws 10 watts per meter, your total structural power consumption is 50 watts.
However, you must never pair a 50W load with a 50W driver. To prevent the driver from overheating and failing prematurely, you must apply a standard 20% safety buffer, also known as the “80% rule.” This rule dictates that a driver should never run at more than 80% of its maximum rated capacity under continuous load. To calculate this buffer, multiply your total calculated wattage by 1.2:
- Total Strip Wattage: 50W
- Safety Multiplier: 1.2
- Minimum Driver Wattage: 60W
If the calculated minimum wattage does not match a standard driver size on the market, always round up to the next available size. In the example above, if a 60W driver is unavailable, choosing a 75W or 100W driver is the correct decision. Rounding down to a 45W or 50W driver will overload the unit, leading to thermal shutdown, flickering, and safety hazards.
Step 3: Account for Amperage and Voltage Drop
Beyond wattage and voltage, you must also understand how current (amperage) flows through your system. You can calculate the required current using Ohm’s Law, where Amps equal Watts divided by Volts. For a 60W system running at 12V, the required current is 5 Amps (60W / 12V = 5A), whereas the same 60W system running at 24V requires only 2.5 Amps (60W / 24V = 2.5A). The driver you select must have an amperage rating that meets or exceeds this calculated requirement.
This relationship between voltage and amperage directly impacts a phenomenon known as voltage drop. As electrical current travels along the thin copper tracks of an LED strip, it encounters resistance, which causes the voltage to gradually decrease over distance. This results in the LEDs at the far end of a long run appearing noticeably dimmer and warmer in color than those closest to the power supply.
It is a common misconception that buying a driver with higher wattage will solve voltage drop; wattage capacity does not change the physical resistance of the strip. To mitigate voltage drop over longer distances, consider these strategies:
- Opt for 24V systems: Because 24V systems draw half the current of 12V systems for the same wattage, they experience significantly less voltage drop and can support longer continuous runs.
- Use thicker gauge wire: When running extension cables between the driver and the start of the LED strip, use thicker wires (lower AWG) to minimize resistance.
- Inject power at both ends: Connect the DC output of your driver to both the beginning and the end of your LED strip run, or run parallel feeds to distribute the current evenly.
Safety and Environmental Checks for Singapore Homes
When installing LED lighting in Singapore, you must ensure that your equipment is fully compatible with the local electrical infrastructure and the physical environment of your home. The standard mains electricity supply in Singapore is 230V AC at a frequency of 50Hz. Always verify that the AC input range listed on your driver’s specification label supports this input (typically marked as 100V-240V or 220V-240V).
The physical placement of your driver dictates the level of environmental protection it requires. This protection is measured by an Ingress Protection (IP) rating:
- Dry Indoor Areas: For standard living room ceiling coves, bedroom wardrobes, or hallway shelving, an IP20-rated driver is sufficient as it offers basic protection against dust but no water resistance.
- Damp or Wet Areas: For installations in kitchens, bathrooms, or covered outdoor balconies, you must use a driver with an IP65 or IP67 rating. These units are sealed against moisture, steam, and water splashes, preventing short circuits and corrosion.
Furthermore, always verify the compatibility of your driver with any control accessories you plan to use, such as wall-mounted dimmers, remote controls, or smart home receivers. If you intend to dim your lights, you must purchase a specific dimmable driver (such as a Triac, 0-10V, or DALI-compatible unit) that matches your dimmer switch’s technology; a standard non-dimmable driver will buzz, flicker, or fail if connected to a dimmer. Finally, while plug-and-play desktop adapters are suitable for simple DIY desk setups, any permanent architectural lighting involving fixed wiring to the mains must be isolated at the mains box and installed by a licensed electrical worker (LEW) to ensure compliance with local safety regulations.
Frequently Asked Questions (FAQ)
Can I use a higher wattage driver than calculated?
Yes, using a driver with a higher wattage rating than your calculated minimum is entirely safe and highly recommended. LED strips operate on a constant voltage system, meaning they only draw the specific amount of current (amperage) they need to run. A 100W driver will not force 100W of power into a 50W strip; it will simply supply the 50W requested while operating under a lighter load. Choosing a higher wattage driver allows the unit to run cooler, operate more quietly, and enjoy a significantly longer operational lifespan.

Community discussion
Share your experience or ask a question. Comments are reviewed before publication.