
Planning a complete home lighting layout with Philips downlights requires balancing room-by-room functional needs, ceiling physical constraints, and technical specifications like color temperature and lumen output. By mapping out your ceiling grid, calculating spacing based on height, and selecting fixtures with appropriate ingress protection and dimming capabilities, you can achieve a balanced, glare-free environment. This guide walks through the step-by-step process of designing a cohesive layout tailored to typical residential spaces, ensuring safety and compliance with local electrical standards.
Assess Room Functions and Ceiling Constraints
To design an effective home lighting layout, you must first evaluate how each room is used and identify the physical limitations of your ceilings. Residential spaces serve diverse purposes, ranging from high-focus tasks to quiet relaxation. Understanding these activities allows you to establish baseline illumination goals before selecting or positioning any fixtures.
Start by categorizing your rooms into functional zones. Task-heavy areas, such as kitchens, home offices, and study rooms, require bright, focused illumination to prevent eye strain during detailed work. Conversely, relaxation zones like bedrooms and living rooms benefit from softer, indirect ambient lighting that promotes comfort and rest.
Products mentioned in this guide
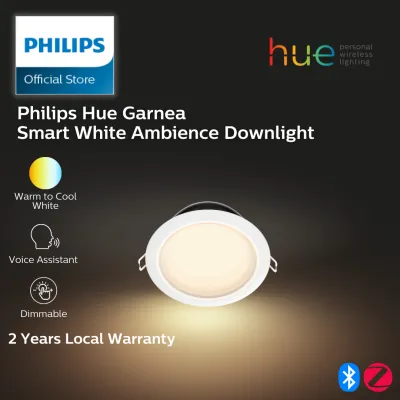
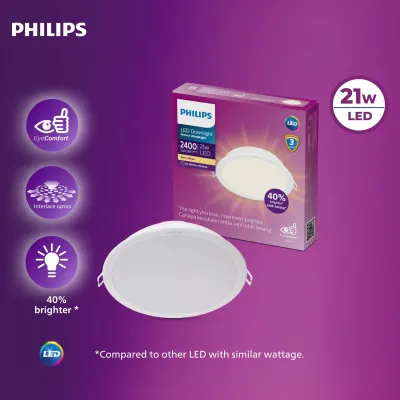
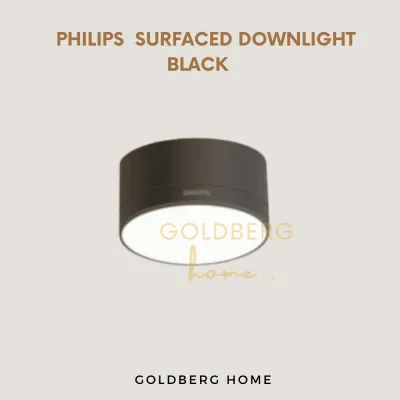
Prices are valid at publication and may change. Please refer to the product page for the latest price.
Next, observe the natural light patterns in each room throughout the day. Spaces with large windows may require less artificial light during daytime hours but will need a robust layout for evening use. Rooms with limited natural light exposure will rely heavily on artificial sources even during the day, making a versatile lighting scheme essential.
Finally, conduct a thorough inspection of your ceiling architecture. The height of your ceiling directly influences how light spreads across a room. Standard residential ceilings in modern apartments and condominiums typically range from 2.6 to 2.8 meters, which limits the physical depth available for recessed fixtures.
Identify structural obstacles such as concrete beams, air conditioning ducting, and plumbing pipes hidden behind plasterboard false ceilings. These obstructions dictate where you can and cannot cut holes for recessed downlights. Measure the available clearance depth within the false ceiling cavity to ensure your chosen downlight models can be installed safely without touching structural elements or wiring conduits.
Calculate Fixture Spacing and Quantities
Achieving even illumination across a room requires precise calculations to determine the correct spacing and quantity of downlights. Placing fixtures too close together can create harsh glare and hot spots, while spacing them too far apart leaves dark corners and uneven shadows.

A reliable starting point for general ambient lighting is to space your downlights at approximately half the height of your ceiling. For example, if your ceiling height is 2.7 meters, a spacing of 1.3 to 1.4 meters between each fixture is highly effective. This ratio ensures that the cones of light overlapping at floor level provide a continuous, uniform wash of light.
The beam angle of your chosen downlight also plays a critical role in spacing. Wide beam angles, typically between 90 and 120 degrees, distribute light over a broad area, making them ideal for general ambient lighting in living rooms and corridors. Narrower beam angles, ranging from 24 to 60 degrees, concentrate light into a tight cone, which is perfect for accentuating artwork or task areas but requires closer spacing if used for general illumination.
Distance from the walls is another crucial measurement. To avoid creating harsh, distracting shadows or highlighting minor imperfections in your wall plaster, position your downlights approximately 60 to 90 centimeters away from the walls. If you intend to use a wall-washing technique to highlight a textured feature wall, you can place specialized adjustable downlights closer to the wall, angling them inward.
Always coordinate your lighting layout with other ceiling fixtures. Plan adequate clearance around ceiling fans, air conditioning cassettes, and decorative pendant lights. Downlights placed too close to fan blades will create a highly distracting strobing effect when the fan is running, which can cause visual discomfort and headaches.
Match Philips Downlight Specifications to Each Zone
Once you have established your layout grid, you must match the technical specifications of Philips downlights to the specific visual and functional needs of each zone. Selecting the right combination of color temperature, lumen output, and dimming capabilities ensures that each room performs optimally.
Color temperature, measured in Kelvin (K), dictates the visual warmth and mood of a space. For living rooms, dining areas, and bedrooms, warm white light (2700K to 3000K) is highly recommended to create a cozy, inviting atmosphere. For kitchens, bathrooms, and home offices, cool white light (4000K) provides a crisp, clean environment that enhances focus and visibility. Cool daylight (6500K) is best reserved for utility yards or specific task areas where precise color rendering is necessary.
Lumen output measures the actual brightness of the light source, which is distinct from wattage. For general ambient lighting in residential spaces, aim for a baseline of approximately 100 to 150 lumens per square meter. For task-intensive zones like kitchen countertops or vanity mirrors, increase this target to 300 to 400 lumens per square meter. Check the product specifications of your chosen Philips downlights to ensure their lumen output matches these requirements.
Dimming compatibility is a vital feature for multi-functional spaces like living rooms and bedrooms. If you plan to install dimmable Philips downlights, verify that the fixtures are compatible with your wall dimmer switches. LED dimming requires compatible phase-cut dimmers (either leading-edge or trailing-edge) or smart lighting controllers to ensure smooth dimming without flickering, buzzing, or premature driver failure.
Consider visual comfort and glare reduction when selecting your fixtures. Look for downlights designed with recessed light sources or specialized diffusers that shield the bulb from direct line of sight. Philips downlights featuring EyeComfort technology are engineered to reduce visible flicker and glare, protecting your eyes during prolonged exposure.
Draft a Room-by-Room Lighting Blueprint
Translating your calculations and specifications into a room-by-room blueprint allows you to visualize how the downlights will interact with your furniture layout and daily routines. Each room requires a tailored approach to balance ambient, task, and accent lighting.
In the living room, establish a balanced grid of ambient downlights as your primary light source. Supplement this grid with adjustable accent downlights positioned to highlight artwork, bookshelves, or architectural features. Ensure the ambient lights are on a separate dimmable circuit from the accent lights, allowing you to transition easily from a bright family gathering to a dim movie-watching environment.
The kitchen demands a highly functional layout. Position downlights directly over the edges of your countertops, prep islands, and sinks. If downlights are placed behind you while you work at the counter, your body will cast shadows over your workspace. Placing them directly overhead ensures clear, shadow-free visibility for food preparation.
In the bedroom, avoid placing downlights directly over the head of the bed. Looking up into a bright light source while lying down is uncomfortable and disruptive to sleep preparation. Instead, position downlights around the perimeter of the room, focusing on wardrobe doors, dressing tables, and walkways. Use low-lumen, warm fixtures to maintain a relaxing atmosphere.
Bathrooms require careful attention to safety and moisture protection. The bathroom is divided into different zones based on proximity to water sources. For downlights installed directly over showers or bathtubs, you must use fixtures with an Ingress Protection (IP) rating of IP44 or higher to protect against water splashes and steam. For dry vanity areas, standard downlights may be acceptable, but IP-rated fixtures offer greater longevity in humid environments.
Integrate your downlights with other lighting layers to avoid a flat, institutional look. Combine recessed downlights with decorative pendant lights over dining tables, track lights for adjustable spotlighting, or LED strip lights in ceiling coves. This layering technique adds depth, texture, and visual interest to your home’s interior design.
Verify Electrical Capacity and Safety Boundaries
Before purchasing your fixtures or beginning any installation work, you must verify that your planned layout aligns with your home’s electrical capacity and safety standards. Proper electrical planning prevents circuit overloads, equipment damage, and potential fire hazards.
Start by assessing your home’s existing wiring load capacity. While modern LED downlights consume significantly less power than legacy halogen fixtures, they still draw an initial inrush current when switched on. Ensure that your electrical circuits, breakers, and switches are rated to handle the total load of your planned fixtures, especially if you are installing a large number of downlights across an open-plan layout.
Thermal management is a critical safety consideration for recessed ceiling lights. Downlights generate heat that must dissipate safely. If your ceiling contains thermal insulation, you must verify whether your chosen downlights are IC-rated (Insulation Contact), meaning they can safely come into direct contact with insulation material. Non-IC-rated fixtures require a physical barrier or a minimum clearance space (typically 50mm to 100mm) around the housing to prevent heat buildup and fire risks.
Verify that all selected fixtures match your local residential voltage (typically 230V) and carry recognized safety certifications, such as the Safety Mark. These certifications guarantee that the products have undergone rigorous testing for electrical safety, insulation quality, and fire resistance.
Establish clear boundaries between planning and execution. While designing the layout, selecting fixtures, and calculating spacing are tasks you can confidently perform as a homeowner, the actual physical installation involves strict safety boundaries. Working with fixed electrical wiring, cutting ceiling joists, and working at heights carry inherent risks.
Always engage a licensed electrical professional or a qualified electrician to handle the wiring, circuit connections, and final installation of your downlights. A professional ensures that all connections are secure, junction boxes are properly enclosed, and the installation complies with local building codes. Before any inspection, maintenance, or replacement of existing fixtures, always isolate the power supply at the main distribution board to eliminate the risk of electrical shock.
Frequently Asked Questions (FAQ)
Can I mix different color temperatures in an open-plan space?
Mixing different color temperatures in a single, open-plan space can create visual confusion and an unbalanced atmosphere. To maintain visual harmony, it is best to establish a uniform baseline color temperature (such as 3000K warm white) for all primary ambient downlights across the entire open area. If you require cooler light for specific tasks, such as food preparation in the kitchen zone, use localized task lighting—such as under-cabinet LED strips or focused pendant lights—rather than changing the color temperature of the main ceiling downlights. This approach provides functional clarity without disrupting the cohesive flow of the space.
How should I place downlights around a ceiling fan?
To prevent a distracting strobing effect caused by fan blades cutting through light beams, you must maintain a safe clearance distance between your downlights and the ceiling fan. Position your downlights outside the maximum sweep of the fan blades. A practical guideline is to place fixtures at a distance of at least 1.5 times the fan blade radius from the center of the fan motor. If this clearance limits your layout, consider using alternative lighting patterns, such as placing downlights in the corners of the room or utilizing wall-mounted sconces and cove lighting to provide ambient illumination without interfering with the fan’s operation.

Community discussion
Share your experience or ask a question. Comments are reviewed before publication.