
Replacing the starter in a light fixture is a straightforward task, but transitioning to modern energy-efficient lighting introduces specific technical requirements. If you are upgrading a traditional fluorescent tube light to a Philips LED tube light, you cannot simply leave the old fluorescent starter in place. To make this switch successfully, you must replace the old Philips S10 starter with a specialized LED dummy starter (often referred to as an LED protector or fuse) or modify the fixture’s internal circuitry.
Why Your LED Tube Needs a Different Starter
Traditional fluorescent light fixtures common in Singapore homes use a magnetic ballast and a starter to ignite the gas inside the tube. The classic Philips S10 starter is designed for 220-240V electrical systems and operates as a thermal glow switch. When you flip the wall switch, the starter heats up a bimetallic strip, creating a temporary short circuit that warms the tube’s filaments. It then opens rapidly, producing a high-voltage inductive kick from the ballast to strike an electrical arc through the mercury vapor.
LED tube lights operate on an entirely different physical principle. They use solid-state light-emitting diodes powered by an internal electronic driver that converts mains AC voltage into low-voltage DC. Because there is no gas to ionize, an LED tube does not require a high-voltage ignition kick. If you attempt to run an LED tube with a standard S10 fluorescent starter still installed in the circuit, the starter will continuously attempt to ignite a non-existent gas, which can quickly overheat the LED driver, destroy the tube, or cause electrical faults.
Products mentioned in this guide
![[Bundle of 5] Philips Fluorescent Tube Starter S10 S2-P](https://img.lazcdn.com/g/p/2c31ea873400d228ace600ad71aaddb4.png_400x400q80.png_.webp)
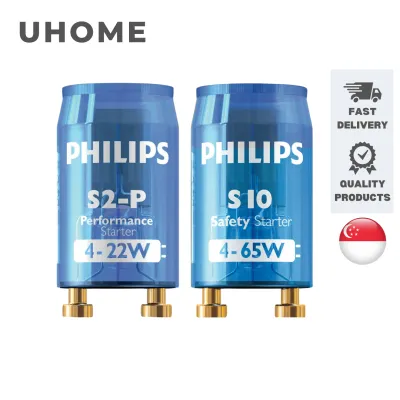

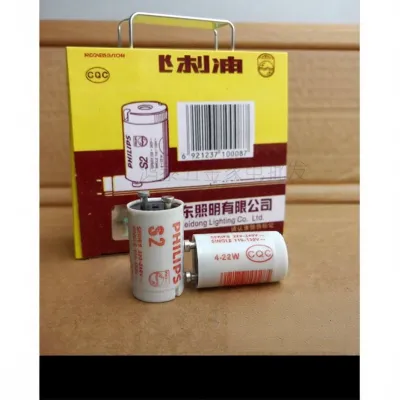
Prices are valid at publication and may change. Please refer to the product page for the latest price.
To solve this, LED manufacturers package their tubes with an “LED dummy starter.” This component looks almost identical to a traditional S10 starter but contains no internal gas-discharge switch or bimetallic strip. Instead, it houses a simple internal wire link or a low-amperage safety fuse. Its sole purpose is to complete the electrical circuit across the starter socket, allowing the current to flow directly to the LED tube’s internal driver without any voltage spikes.
Before purchasing any replacement components, you must consult the manufacturer instructions printed on your specific LED tube’s packaging. Different brands and models of LED tubes have distinct wiring requirements. Some require this dummy starter to operate safely with your existing magnetic ballast, while others are designed for direct mains connection, meaning the starter socket and the ballast must be completely bypassed.
Essential Tools and Electrical Safety Preparations
Working with residential electrical fixtures requires strict adherence to safety protocols to prevent electrical shock or short circuits. Before you begin the replacement process, gather the necessary tools and safety gear. You will need a pair of insulated gloves rated for electrical work, a reliable non-contact voltage tester, a stable step ladder to reach the ceiling safely, and the correct replacement component—either a genuine Philips S10 starter (if you are maintaining a fluorescent setup) or the compatible LED dummy starter supplied with your new LED tube.

Never rely solely on the wall switch to isolate the electrical current. In many Singapore residential wiring setups, the wall switch may only interrupt the neutral wire rather than the live wire, leaving live voltage present at the light fixture even when the switch is in the “off” position. To guarantee your safety, locate your home’s main distribution board (DB box), which is typically found near the main entrance or inside the utility shelter. Switch off the miniature circuit breaker (MCB) that controls the lighting circuit for the room where you are working.
Once you have switched off the correct circuit breaker, climb the step ladder and verify that the power is completely disconnected. Hold your non-contact voltage tester close to the light fixture’s end caps (tombstones) and along the body of the tube. The tester will emit a continuous beep or flash red if voltage is still present. Do not touch any part of the fixture, starter, or tube until the voltage tester confirms that the circuit is entirely dead.
How to Safely Remove the Old Fluorescent Starter
With the power verified as completely off, you can proceed to remove the old components. If your fixture has a protective plastic diffuser cover, gently release the clips or slide the cover off and set it aside in a secure location. To gain unobstructed access to the starter, you must first remove the existing light tube from the fixture.
Fluorescent tubes are highly fragile and contain trace amounts of toxic mercury vapor. To remove the tube safely, support its weight with both hands near the ends. Gently rotate the tube 90 degrees in either direction until the metal pins at both ends align vertically with the exit slots in the G13 tombstone sockets. Carefully slide the tube downward and out of the sockets. Place the old tube on a flat, padded surface where it cannot roll off or break.
Once the tube is removed, locate the starter. It is a small, cylindrical plastic canister protruding from the metal casing of the fixture, usually positioned near one of the end sockets. Grasp the starter firmly between your fingers. Apply gentle upward pressure into the socket, then twist the starter counter-clockwise (approximately a quarter-turn). You will feel it click out of its locked position. Pull the starter straight down to extract its two brass pins from the socket slots.
Before installing the new component, take a moment to inspect the empty starter socket. Use a flashlight to check for any signs of physical degradation. Look closely for heat discoloration (yellowing or browning of the white plastic), melted edges, cracks, or green copper corrosion on the internal metal contacts. If you observe any of these warning signs, the socket is compromised and can create a high-resistance connection, leading to localized overheating. In such cases, the entire fixture or the socket holder must be replaced by a professional before proceeding.
Installing the New S10 or LED Dummy Starter
To install your new Philips S10 or LED dummy starter, align its two metal pins with the matching keyhole slots in the starter socket. The pins have enlarged heads that must enter the wider part of the socket slots first. Once the pins are inserted, press the starter gently into the socket and twist it clockwise (approximately a quarter-turn) until you feel a distinct click. This click indicates that the pins have slid into the narrower channel of the socket and are locked securely against the internal copper contacts.
Do not use excessive force during this step. The internal components of the starter socket are often made of brittle thermoplastic or bakelite. If the starter does not rotate smoothly, do not force it, as this can easily bend the brass pins or crack the socket housing. If you meet resistance, pull the starter straight out, check the alignment of the pins, ensure they are straight, and try inserting them again.
With the starter securely locked in place, you can now reinstall the LED tube light. Pay close attention to the markings on the LED tube, as its physical orientation is critical to safe operation. Many LED tubes are “single-ended,” meaning they only receive electrical power through the pins at one specific end of the tube. The other end contains dummy pins designed solely to hold the tube physically in place within the fixture.
Look for a label on the tube indicating “Input,” “L/N,” or a power diagram. Ensure that the powered end of the LED tube is inserted into the tombstone socket that is directly wired to the mains power supply and the starter circuit. Align the pins vertically, slide them into the G13 sockets at both ends of the fixture, and rotate the tube 90 degrees until it locks into place. You should feel a slight mechanical detent, and the tube’s labeling should face downward or outward toward the room. Double-check that both ends of the tube are fully seated and that the tube is secure before moving away from the fixture.
Powering On and Troubleshooting the Fixture
After confirming that both the starter and the LED tube are correctly installed and securely seated, you can restore power to the circuit. Step down from the ladder and return to your home’s main distribution board. Switch the lighting circuit breaker back to the “on” position. Return to the room and flip the wall switch. Your new LED tube should illuminate instantly at full brightness without any of the flickering, blinking, or humming characteristic of old fluorescent systems.
If the light fails to turn on, do not panic. Turn off the wall switch immediately and follow a systematic troubleshooting checklist. First, check your distribution board to ensure the circuit breaker did not trip immediately upon powering on, which would indicate a direct short circuit. If the breaker remains on, turn off the power at the breaker again before climbing the ladder to inspect the fixture.
Verify that the LED tube is rotated fully into the G13 tombstone sockets. If the tube is slightly misaligned, the pins will not make contact with the internal terminals, preventing the circuit from completing. Next, check the dummy starter to ensure it was twisted completely into its locked position. A loose dummy starter will break the circuit, preventing power from reaching the single-ended input of the LED tube.
If you have verified all connections and the light still does not work, your fixture may contain an incompatible electronic ballast rather than a magnetic ballast. Electronic ballasts operate at high frequencies and do not utilize a starter socket. If your original fixture did not have a starter to begin with, or if the new LED tube is incompatible with the existing electronic ballast, the fixture will require direct mains rewiring. This process involves disconnecting and bypassing the ballast entirely, wiring the mains live and neutral wires directly to the G13 socket.
Safety Boundaries: When to Call a Qualified Electrician
While replacing a starter is a simple task, modifying fixed electrical wiring is not a DIY job. If your troubleshooting reveals that the fixture contains an electronic ballast, or if the internal wiring is damaged, you must stop immediately. In Singapore, any modifications to fixed electrical installations, including bypassing ballasts or rewiring light fixtures, must be performed by an Energy Market Authority (EMA) licensed electrical worker to ensure compliance with local electrical safety standards (SS 638).
Do not attempt to cut, splice, or reroute the internal wires of your light fixture if you are not qualified. Doing so can lead to severe electrical shocks, short circuits, or fire hazards. Furthermore, if you notice any burnt smells, see visible scorch marks on the wiring, or hear persistent buzzing or sizzling sounds coming from the fixture after turning it on, shut off the power at the main breaker immediately and contact a licensed professional to inspect and repair the installation. Prioritizing professional assistance ensures your home’s electrical system remains safe and compliant.

Community discussion
Share your experience or ask a question. Comments are reviewed before publication.