
Installing an E27 socket extension for a pendant light is an effective way to adjust the height, position, and visual impact of your ceiling lighting. Whether you want to lower a bulb over a dining table or bring light closer to a workspace, this modification requires a careful balance of electrical safety and structural support. By following proper installation protocols, verifying component compatibility, and securing the physical load correctly, you can achieve a professional-looking result while keeping your home safe.
Preparation and Safety Boundaries
Before beginning any electrical work, establishing non-negotiable safety boundaries is critical to prevent electrical shocks, short circuits, or physical hazards. The most important step is complete power isolation. Always turn off the main power supply at your home’s circuit breaker (consumer unit) rather than relying solely on the wall switch. Wall switches may only cut the live wire, leaving other parts of the circuit active or susceptible to miswiring hazards.
Next, verify the compatibility of your E27 socket extension. You must check that the extension’s rated voltage matches your local electrical supply, which is typically 220V-240V in Singapore. Additionally, inspect the maximum wattage limit printed on the extension socket and ensure it can safely handle your chosen bulb. Using a bulb that exceeds these limits can cause overheating, melting, or electrical fires.
Products mentioned in this guide
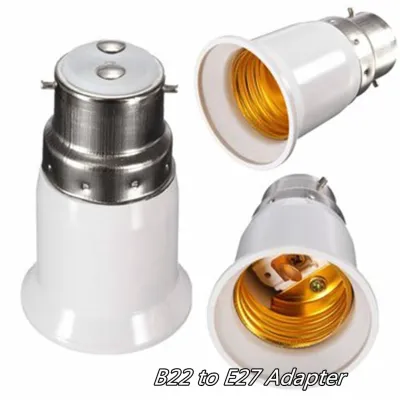
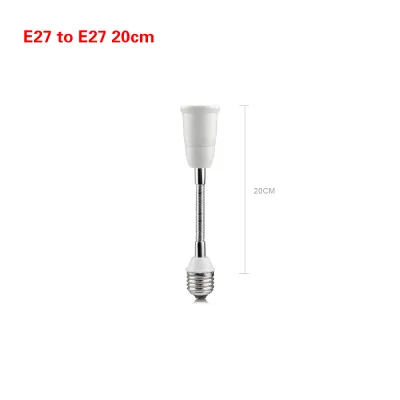
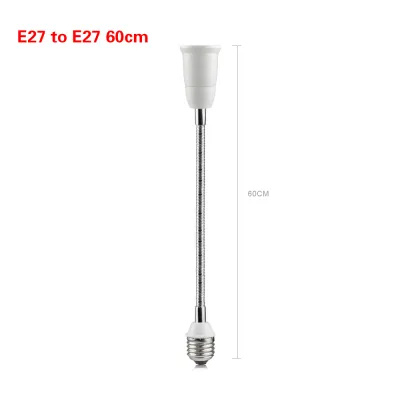
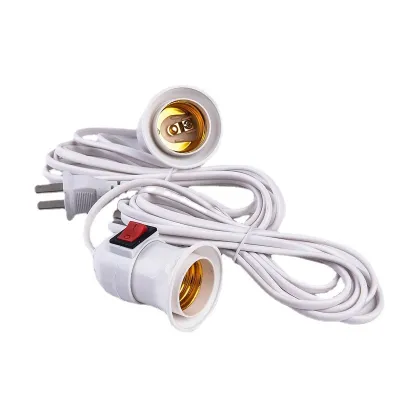
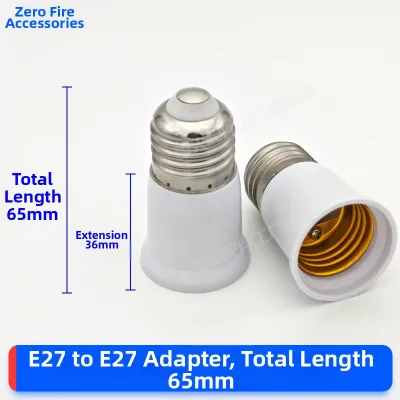
Prices are valid at publication and may change. Please refer to the product page for the latest price.
You must also confirm the structural load-bearing capacity of your ceiling mounting point. Pendant lights and extensions introduce suspended loads that exert continuous downward force. Concrete ceilings require robust masonry anchors, while hollow plasterboard or false ceilings require specialized toggle bolts. Never hang a heavy fixture directly from fragile drywall or plasterboard without securing it to a structural joist or using certified load-bearing hardware.
Finally, define clear stop conditions before you begin. If you encounter aged, brittle, or exposed wires during the process, or if the ceiling structure is unknown or unstable, halt the installation immediately. Do not attempt to proceed if you suspect the existing wiring does not comply with modern safety standards. In these scenarios, you must consult a qualified professional to assess and resolve the issue.
Tools and Materials Required
Having the correct tools and materials on hand ensures a smooth, safe, and efficient installation process. Before starting, prepare a dedicated workspace and gather all necessary equipment to avoid mid-project interruptions.

For electrical safety and connection, you will need a reliable non-contact voltage tester to confirm that the power is completely isolated. You also require wire strippers to prepare the wire ends, insulated screwdrivers (both flathead and Phillips) to secure terminal connections, and high-quality electrical tape for added insulation.
For physical mounting, select appropriate hardware based on your ceiling material. This includes ceiling hooks, mounting brackets, and wall anchors that match the weight of your fixture. Always refer to the manufacturer’s installation instructions to verify the weight limits and compatibility of these fasteners.
Auxiliary tools are also essential for working at height and achieving precise alignment. Ensure you have a sturdy, stable ladder to work comfortably. A measuring tape will help you determine the exact drop height of the pendant light, and cable clips or cord grips will secure the cable neatly. Before starting, check if all hardware is included with your E27 extension or pendant kit, and purchase spec-compliant replacements if any parts are missing or damaged.
Step-by-Step Installation Guide
This guide outlines the logical operational path to safely wire, mount, and secure your E27 socket extension and pendant light.
Wiring the E27 Socket Extension
Before touching any electrical wires, position your ladder securely and use your non-contact voltage tester on the ceiling wires to double-check that the power is completely disconnected. Test the voltage tester on a known live outlet first to ensure it is functioning correctly, then test the ceiling wires. Only proceed when you are certain there is no electrical current flowing through the wires.
Identify the wire color codes carefully. In modern Singapore installations, the standard colors are typically brown for live (L), blue for neutral (N), and green-and-yellow stripes for earth (E). Older installations might use red for live, black for neutral, and green for earth. Always refer to the wiring diagram provided with your E27 extension and match the wires strictly according to their labels rather than relying solely on color.
Use wire strippers to remove approximately 8mm to 10mm of the outer insulation from the wire ends, taking care not to nick or damage the copper strands inside. Twist the copper strands tightly together to prevent stray wires from touching adjacent terminals. Insert the stripped wire fully into the terminal block of the E27 extension, ensuring that no bare copper is exposed outside the connector housing. Tighten the terminal screws firmly, then give each wire a gentle tug to confirm a secure connection.
If your ceiling outlet lacks an earth wire, or if the existing wire colors do not match standard configurations and cause confusion, do not attempt to guess the connections. Stop the installation immediately and contact a licensed electrical professional to assess your home’s wiring.
Mounting and Securing the Pendant Light
Once the electrical connections are prepared, focus on the physical installation. Select the correct drilling method and anchors based on your ceiling material. For concrete ceilings, use a rotary hammer drill with a masonry bit and insert heavy-duty expansion plugs. For hollow plasterboard ceilings, use spring toggle bolts that expand behind the board to distribute the weight. Always verify the load-bearing rating printed on the bracket or anchor packaging.
It is critical to secure the weight-bearing cord or strain relief clamp directly to the ceiling hook or mounting bracket. The electrical wires must never support the physical weight of the pendant light or the E27 extension. Allowing the wires to bear the load can stretch the copper, loosen the terminal connections, and create a severe fire or shock hazard. Use the strain relief clamp provided with the kit to lock the cable firmly in place at the ceiling canopy.
Adjust the extension cord to your desired drop height. Use the built-in cord adjuster or secure the excess cable neatly inside the ceiling canopy using cable clips. Ensure there is enough slack in the electrical wires so they remain completely unstressed.
Slide the decorative canopy up against the ceiling to cover the junction box and mounting bracket. Tighten the canopy’s collar screw or locking nut to hold it flush against the ceiling surface. Ensure the E27 socket housing is fully assembled and screwed together tightly, with no gaps or loose parts that could wobble.
Testing and Final Adjustments
Before restoring power at the main circuit breaker, perform a final visual inspection. Ensure all wire connections are fully enclosed within the ceiling canopy or the socket housing, and that no insulation is pinched between metal parts.
Walk to your main distribution board and switch the circuit breaker back on. Return to the room and turn on the wall switch. Watch the fixture closely for any signs of flickering, listen for unusual buzzing or humming noises, and check for any burning smells. If you notice any of these anomalies, turn off the wall switch and cut the power at the circuit breaker immediately before investigating the wiring.
If the initial test is successful, turn off the wall switch and install an E27 bulb. Ensure the bulb’s wattage and heat output do not exceed the maximum limits specified on the E27 socket extension. For example, using a high-wattage incandescent bulb in a socket rated only for low-wattage LEDs can melt the plastic housing and create a fire hazard.
Step back and evaluate the pendant light’s position. Fine-tune the vertical alignment to ensure the cord hangs perfectly straight. If the cord has kinks from being packaged, gently smooth them out by hand or allow the weight of the fixture to straighten the cable naturally over a few days. Ensure the light is suspended at a height that does not obstruct movement or create a collision hazard.
When to Call a Qualified Electrician
While installing an E27 socket extension can be a straightforward DIY project, certain situations require professional expertise to ensure safety and compliance. If your ceiling does not have an existing junction box or light outlet, creating a new electrical point requires running new fixed wiring through your walls or ceiling. This type of work must be handled by a professional.
Additionally, if you plan to install a pendant light in damp or wet areas, such as a bathroom or an outdoor balcony, specific moisture-resistant fixtures and specialized wiring techniques are required. In Singapore, electrical modifications beyond simple bulb or fixture replacements often require a licensed electrical worker (LEW) to comply with local safety regulations and standards.
Hiring a qualified professional ensures that your home’s electrical system remains balanced. An electrician can evaluate the overall circuit load to prevent overloading, verify that your earthing system is functioning correctly, and guarantee that all connections are safe, durable, and fully compliant with local building codes.
Frequently Asked Questions (FAQ)
Can I use an E27 socket extension with a dimmer switch?
Yes, you can use an E27 socket extension with a dimmer switch, but compatibility depends entirely on the bulb and the wall dimmer switch you use, not on the extension cord itself. The extension cord simply acts as a physical and electrical bridge. To ensure smooth dimming without flickering or buzzing, you must use a dimmable E27 bulb (such as a dimmable LED) and pair it with a compatible wall dimmer switch. Check the compatibility labels on the bulb packaging and the technical specifications in your dimmer switch manual before installation.
How do I determine the correct drop height for my pendant light?
The ideal drop height depends on where the pendant light is installed and how the space is used. For installations above a dining table or kitchen island, a common starting point is to suspend the bottom of the light fixture approximately 75cm to 90cm above the tabletop surface. If the light is installed in a hallway or open walkway, ensure the bottom of the fixture is at least 2.1 metres above the floor to prevent tall occupants or guests from bumping into it. Always fine-tune the final height based on your family’s height, sightlines, and the overall proportions of the room to avoid direct glare.

Community discussion
Share your experience or ask a question. Comments are reviewed before publication.