
Replacing a faulty gu10 socket in your ceiling downlight or track spotlight is a highly manageable task that restores reliable lighting to your home. The GU10 socket is a twist-lock lamp holder designed to operate directly on mains voltage without an external driver. When a socket degrades over time due to thermal stress or physical wear, replacing it promptly ensures your electrical circuit remains safe and your bulbs perform optimally.
To complete this task safely, you must follow a methodical approach: isolate the electrical supply at your main distribution board, carefully extract the fixture, disconnect the degraded wiring, and install a certified replacement socket. By taking precise precautions and using the correct tools, you can successfully restore your lighting fixtures without compromising your home’s electrical safety.
Identifying a Faulty GU10 Socket and Setting Safety Boundaries
Before beginning any electrical work, you must accurately diagnose whether your gu10 socket is the true source of your lighting issues. Sockets degrade over time, particularly in older installations or fixtures that previously housed high-heat halogen bulbs.
Products mentioned in this guide
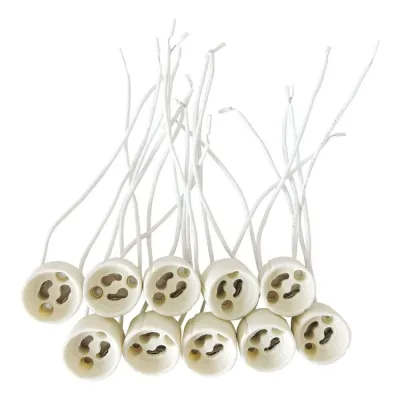
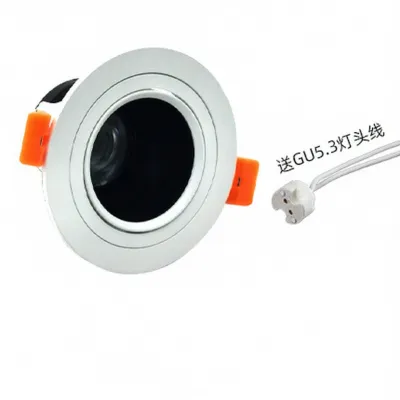
Prices are valid at publication and may change. Please refer to the product page for the latest price.
Look for clear physical and operational indicators of failure:
- Discoloration and Melting: Inspect the socket body. Ceramic sockets may show dark brown or black scorch marks, while plastic sockets can warp, crack, or show visible melting around the terminal contacts.
- Persistent Flickering: If a newly replaced, verified-working GU10 bulb continues to flicker, cycle on and off, or fail to light up entirely, the internal metal contact tabs inside the socket may have lost their spring tension or accumulated excessive corrosion.
- Loose Physical Fit: When you insert a GU10 bulb, it should lock firmly into place with a distinct twist. If the bulb feels loose, droops, or fails to make stable contact, the internal socket housing is compromised.
- Burning Odours: A distinct plastic or fishy burning smell emanating from a ceiling downlight is a critical warning sign of electrical arcing or overheating wires, requiring immediate isolation.
Working with mains electricity carries inherent risks of severe shock, electrocution, and electrical fires. In Singapore, residential properties operate on a 230V mains supply, which requires strict adherence to safety protocols.
Before starting, always check the replacement socket’s product label and your existing downlight fixture’s manufacturer instructions for compatibility, maximum wattage limits, and specific wiring diagrams. If the instructions conflict, if your fixture is unidentified, or if your specific use case is not covered, stop immediately and consult the manufacturer or a qualified professional.
Isolate the main power before beginning. Never rely solely on the wall switch to turn off the power. Wall switches may only cut the live wire, leaving neutral lines or improperly wired circuits live. Always go to your home’s main distribution board (DB box) and switch off the specific miniature circuit breaker (MCB) controlling the lighting circuit. For absolute safety, switch off the main residual current circuit breaker (RCCB) or main switch during the replacement process.
Establish stop-work conditions before touching any wires. You must evaluate the state of your existing electrical system. If you pull down the fixture and discover brittle, crumbling wire insulation, scorched copper conductors, or a complete absence of an earth connection in a metal fixture, stop immediately. Do not attempt to wire a new socket onto compromised household wiring. Under these conditions, or if you feel any uncertainty regarding mains voltage connections, you must halt the project and consult an Energy Market Authority (EMA) licensed electrician in Singapore to inspect and repair the wiring safely.
Essential Tools and Materials for a GU10 Socket Replacement
Having the correct equipment on hand ensures you can work efficiently and maintain high safety standards throughout the installation. Do not attempt to improvise with standard household tools that lack proper electrical insulation.

Prepare the following checklist before starting your project:
- Replacement GU10 Socket: Select a high-quality replacement socket. Ceramic (porcelain) sockets are highly recommended over standard plastic alternatives due to their superior thermal resistance and durability. Ensure the socket is rated for 230V and carries relevant safety certifications. Choose between a pre-wired pigtail socket (which comes with heat-resistant silicone insulated wires) or a terminal-block socket, depending on your fixture's design.
- Insulated Screwdrivers: Use VDE-certified insulated screwdrivers (typically rated up to 1,000V) to prevent accidental grounding or shocks. You will generally need a small flathead screwdriver for terminal blocks and a medium Phillips screwdriver for fixture mounting plates.
- Non-Contact Voltage Tester: This is an indispensable safety tool used to verify that no electrical current is flowing through the wires before you touch them.
- Wire Strippers and Cutters: A dedicated tool to cleanly strip back wire insulation without nicking or damaging the underlying copper strands.
- Wire Connectors: Modern push-in wire connectors (such as lever connectors) or high-quality screw terminal blocks enclosed in a protective junction box are essential for making secure, code-compliant splices.
- Access and Personal Protective Equipment: A sturdy, slip-resistant step ladder is required to reach ceiling downlights comfortably. Always wear safety glasses to protect your eyes from falling drywall dust, plaster, or debris when working directly underneath ceiling cavities.
How to Safely Remove the Old GU10 Socket and Fixture
With your tools prepared and the power isolated at the DB box, you can begin the physical removal of the old socket. Work slowly to avoid damaging the ceiling plasterboard or the delicate mounting clips of your downlight housing.
Follow these steps to extract the components safely:
First, verify power isolation. Hold your non-contact voltage tester close to the light switch and then directly up to the downlight fixture. Test the device on a known live source first to confirm it is functioning, then test the target wires. Only proceed when the tester confirms there is absolutely no voltage present.
Next, remove the bulb and retaining clip. Many GU10 downlights use a metal spring clip or a retaining ring to hold the bulb in place. Squeeze the ends of the spring clip inward to release it, then gently pull the GU10 bulb downward. Twist the bulb counterclockwise approximately 45 degrees to release its two pins from the socket keyholes, then set the bulb aside.
Carefully extract the downlight housing. Carefully pull the outer trim of the downlight housing downward away from the ceiling. Be extremely cautious of the spring-loaded tension clips on either side of the housing. These springs are under high tension and can snap back painfully onto your fingers or chip the surrounding ceiling plaster if released too quickly. Hold the clips flat against the side of the housing as you slide the fixture out of the ceiling cutout. For track spotlights, unscrew the canopy or track adapter according to the manufacturer’s instructions to access the internal wiring compartment.
Document the wiring configuration before proceeding. Once the fixture is suspended from the ceiling cavity, locate the junction box or terminal connection point where the socket wires meet the household mains wiring. Before loosening any screws or cutting any wires, use your smartphone to take a clear, well-lit photograph of the wiring configuration. Note the colors of the wires: in standard Singapore installations, the active Live wire is typically brown (or old red), the Neutral wire is blue (or old black), and the Earth wire is green-and-yellow (or bare copper).
Finally, disconnect the old socket. Open the protective junction box. Loosen the terminal screws or release the wire connectors to free the old socket’s pigtail wires from the mains supply. If the old socket is screwed directly into the metal frame of the downlight, remove the mounting screws to completely detach the old socket.
Wiring and Installing the New GU10 Socket Correctly
Proper electrical connections are critical to prevent resistance, overheating, and potential electrical fires. Follow precise installation steps to ensure your new gu10 socket is wired securely and safely.
Begin by preparing the wires. Examine the ends of the household mains wires. If the copper strands are frayed, oxidized, or damaged, use your wire cutters to trim away the compromised section. Use wire strippers to carefully strip approximately 8mm to 10mm of insulation from the wire ends, ensuring you do not nick the copper core.
Connect the wires with proper polarity. Connect the new socket wires to the household mains wires using your chosen connectors. Match the wires carefully: connect Live (brown) to Live, Neutral (blue) to Neutral, and Earth (green-and-yellow) to the fixture’s earth terminal if you are using a grounded metal housing. If your replacement socket is a pre-wired ceramic pigtail, it may have two blue or white heat-resistant wires; because GU10 LED bulbs are non-polarized, these can connect to Live and Neutral, but always prioritize matching marked terminals (L and N) on the socket body if they are explicitly labeled. Ensure every wire connection is tight and secure. Give each wire a gentle tug test to verify it cannot slip out of the connector. Loose connections can lead to dangerous electrical arcing.
Mount the socket to the fixture. Position the new socket back into the downlight housing or track spotlight body. Secure it firmly using the original mounting screws or retaining clips. Ensure the socket sits perfectly level so the bulb will align straight within the trim.
Manage cable slack and heat exposure. This is a vital safety step that is often overlooked. GU10 bulbs, especially older halogen models or high-power LEDs, can generate significant heat at the back of the bulb. Carefully route the supply wires and any excess cable slack away from the immediate rear of the lamp holder. Ensure the wires do not rest directly against the hot casing of the bulb or the metal heatsink of the fixture. Tuck the wires neatly back into the ceiling cavity or the junction box compartment, ensuring they are not pinched by the downlight housing during reinsertion.
Reassemble the fixture. Compress the spring-loaded clips on the downlight housing and gently slide the fixture back into the ceiling cutout until the trim sits flush against the plasterboard. Reinstall the GU10 bulb by aligning its pins with the socket keyholes, pushing upward, and twisting clockwise until it locks. Replace the metal retaining ring or spring clip to secure the bulb.
Testing Your New Setup and Ensuring Long-Term Safety
Once the physical installation is complete, you must verify that the system is fully functional and operates safely under normal load conditions.
Restore power and test. Return to your main distribution board (DB box) and switch the lighting circuit breaker back to the “ON” position. Flip the wall switch to turn on your newly installed GU10 light. The bulb should illuminate instantly without flickering, buzzing, or delay.
Conduct a thermal and operational check. Leave the light switched on for approximately 15 minutes. Stand near the fixture and observe it closely. Check for any unusual humming or buzzing sounds, which can indicate a loose electrical connection or a compatibility issue between the bulb and your dimming system. Smell the area around the fixture to ensure there are no faint burning plastic odors. If you notice any of these symptoms, turn off the power at the DB box immediately and recheck your connections.
Perform long-term maintenance. To maximize the lifespan of your new gu10 socket and bulb, keep the fixture free of dust and debris. Periodically vacuum around the downlight trim to prevent dust accumulation inside the ceiling cavity, which can trap heat and degrade electrical insulation. Ensure that any ceiling insulation (such as fiberglass batts) is kept at a safe clearance distance from the downlight fixture, unless the fixture is explicitly rated for direct insulation contact (IC-rated). Maintaining adequate ventilation around the light fixture is essential for heat dissipation and long-term electrical safety.
Frequently Asked Questions (FAQ)
Can I replace a plastic GU10 socket with a ceramic one?
Yes, replacing a plastic GU10 socket with a ceramic one is highly recommended. Ceramic sockets offer superior thermal resistance, meaning they can withstand much higher operating temperatures without warping, cracking, or degrading. This is particularly critical if you are using high-wattage halogen bulbs or high-output LED bulbs in enclosed downlight fixtures where heat dissipation is limited. When selecting a ceramic socket, ensure it is rated for the correct voltage and fits the mounting dimensions of your existing fixture.
Do GU10 sockets require a transformer or driver?
No, GU10 sockets do not require an external transformer or LED driver. They are designed to run directly on standard mains voltage, which is 230V in Singapore. This direct-mains capability distinguishes GU10 systems from low-voltage MR16 or GU5.3 systems, which require a step-down transformer to convert 230V mains power to 12V. Eliminating the transformer simplifies the lighting circuit, reduces potential failure points, and makes troubleshooting much easier.

Community discussion
Share your experience or ask a question. Comments are reviewed before publication.