
Replacing a damaged or outdated E27 bulb socket is a practical home maintenance task that can restore functionality to your favorite light fixtures. The E27 bulb socket, also known as the Edison screw (ES) base with a 27mm thread diameter, is one of the most widely used bulb bases in Singaporean households, found in everything from pendant lights to wall sconces. While swapping out a socket is a straightforward project, it involves working directly with your home’s 230V electrical system. To complete this task safely without professional intervention, you must follow strict isolation protocols, understand your wiring colors, and use the correct tools.
Before You Start: Electrical Safety Rules and When to Call an Electrician
Mains electricity in Singapore operates at 230V, which carries severe risks of electric shock, electrocution, and electrical fires if handled incorrectly. Before attempting any DIY electrical work, you must understand your limits. In Singapore, the Energy Market Authority (EMA) regulations permit homeowners to perform basic, like-for-like replacements of light fittings and accessories, provided no modifications are made to the fixed wiring of the home.
However, you must stop immediately and contact a Licensed Electrical Worker (LEW) if you encounter any of the following conditions:
Products mentioned in this guide
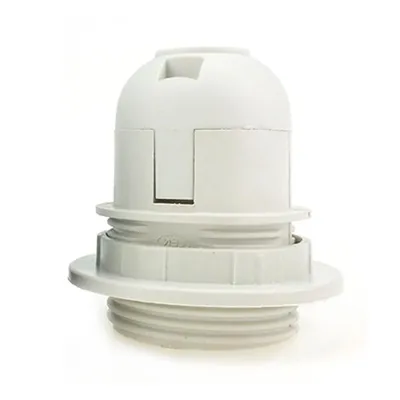
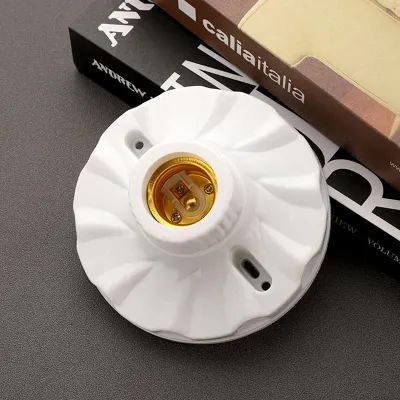
![⭐️ [SG SELLER] ⭐️ E27 Screw Socket In-line Lamp Holder / Home Energy Saving Wall Light Socket / ABS Synthetic Direct Plug In Light Bulb](https://img.lazcdn.com/g/p/483eb2b00481163fb2091a9d649ef49f.jpg_400x400q80.jpg_.webp)
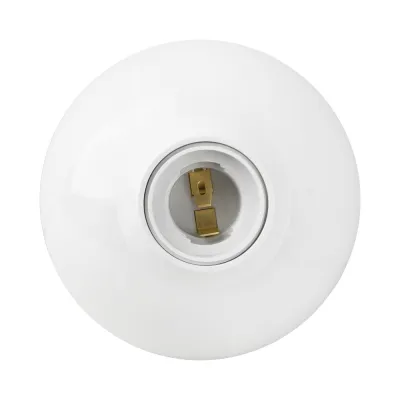
![[SG FREE ] 1Pc LED Light Bulb E27 Socket Lamp Base Holder Adapter Converter With Switch EU UK Plug Energy Saving Lamp F](https://img.lazcdn.com/g/p/b5bd2697fbbdbae80a04cf62cbc9482a.jpg_400x400q80.jpg_.webp)
Prices are valid at publication and may change. Please refer to the product page for the latest price.
- The existing wires are brittle, cracked, frayed, or show signs of melting or scorching.
- You find a missing earth wire in a location where a metal (Class I) fixture is being installed.
- The ceiling rose, wall junction box, or mounting bracket is severely cracked or structurally compromised.
- The wiring configuration is highly complex, non-standard, or uses obsolete wiring colors that you cannot confidently identify.
- You feel any uncertainty about the circuit layout or how to isolate the power safely.
Never rush through the preparation phase. Taking shortcuts with electricity can lead to catastrophic failures, personal injury, or voiding your home insurance policy.
Tools and Materials You Will Need
To ensure a smooth and safe replacement process, gather all necessary tools and materials before you begin. Having everything within arm’s reach prevents you from leaving a disassembled, potentially live circuit unattended.

- Replacement E27 bulb socket: Choose a high-quality socket that matches your fixture's mounting style (such as a pendant holder, batten holder, or wall bracket). Ensure it carries the Enterprise Singapore Safety Mark to verify it meets local safety standards.
- Non-contact voltage tester: This is your most critical safety tool. It allows you to verify that no electrical current is flowing through the wires before you touch them.
- Insulated screwdrivers: Both flathead and Phillips head screwdrivers with insulated shafts rated for electrical work.
- Wire strippers and cutters: For trimming damaged wire ends and stripping back insulation cleanly.
- Electrical tape: For temporary labeling or wrapping wire bundles if necessary.
- Sturdy step ladder: If you are working on a ceiling-mounted fixture, use a stable, non-conductive ladder (fiberglass or wooden ladders are preferred over aluminum).
- Safety glasses: To protect your eyes from falling plaster, dust, or debris when working overhead.
Step 1: Isolate the Power and Verify the Circuit is Dead
The absolute first rule of any electrical task is to isolate the power supply at the source. Never rely on the wall switch alone to turn off the power. A wall switch may only break the neutral wire while leaving the live wire active (a common and dangerous wiring error), or the switch itself could be faulty.
Begin by locating your home’s main distribution board (DB box), typically situated near the entryway, utility closet, or kitchen in Singapore flats. Identify the Miniature Circuit Breaker (MCB) that controls the lighting circuit for the room you are working in. Switch this breaker to the “OFF” position. If your DB box is not clearly labeled, turn off the main switch to cut power to the entire home temporarily.
Once you have switched off the breaker, return to the light fixture. Attempt to turn the light switch on; the bulb should not light up. Next, use your non-contact voltage tester. Bring the tip of the tester close to the socket’s interior contacts and the wires feeding into it. The tester must indicate that no voltage is present (usually by remaining silent and showing a green light, rather than flashing red and beeping). Test the voltage tester on a known live outlet first to ensure it is functioning correctly, then test the light socket, and finally test the tester again on the live outlet to confirm its reliability. Only when you have verified zero voltage can you safely proceed.
Step 2: Dismantle and Remove the Old E27 Socket
With the power verified as dead, you can now safely dismantle the old fixture. Carefully unscrew the existing light bulb from the E27 socket and set it aside in a secure location. If the socket has a decorative cover, shade, or threaded locking ring holding a lampshade in place, remove these components next.
Locate the mounting screws securing the socket base to the ceiling rose, wall bracket, or mounting box. Use your insulated screwdriver to loosen these screws, allowing the socket body to gently pull away from the mounting surface. Do not pull forcefully, as this can strain the copper conductors inside the wall or ceiling.
Once the wiring terminals are exposed, take a clear, high-resolution photograph of the connections with your smartphone. This photo will serve as an invaluable reference during reassembly. In Singapore, you may encounter two different wiring color standards depending on the age of your property:
- New Standard (Post-2001): Live is Brown, Neutral is Blue, and Earth is Green-and-Yellow.
- Old Standard (Pre-2001): Live is Red, Neutral is Black, and Earth is Green.
Carefully loosen the terminal screws to release the wires. Inspect the exposed copper ends. If the copper is oxidized, brittle, or shows signs of heat damage, use your wire cutters to snip off the damaged portion. Use wire strippers to carefully remove approximately 5mm to 8mm of outer insulation from each wire, exposing clean, bright copper strands.
Step 3: Wire and Secure the New E27 Socket
Now you are ready to install the new E27 bulb socket. Examine the terminals on the new socket carefully. They should be marked with letters indicating their function: “L” for Live, “N” for Neutral, and “E” or the ground symbol for Earth (if the socket is metallic or requires grounding).
Insert the exposed copper end of the Brown (or Red) wire into the terminal marked “L” and tighten the terminal screw firmly. Insert the Blue (or Black) wire into the terminal marked “N” and tighten it. If your socket is a Class I metal fixture, you must connect the Green-and-Yellow (or Green) Earth wire to the terminal marked “E” or the ground symbol. If you are using a Class II double-insulated plastic socket that does not have an Earth terminal, do not cut the Earth wire. Instead, terminate it safely in a separate connector block or wrap the exposed end securely with electrical tape, then tuck it neatly into the mounting box.
Ensure that all terminal screws are tight and that no bare copper wire is exposed outside the terminal block. Gently tug each wire to confirm it is securely clamped. If you are replacing a pendant light socket, ensure the cord grip (a plastic or metal clamp inside the socket cap) is tightened securely around the outer sheath of the cable. This cord grip prevents the physical weight of the light fixture and bulb from pulling directly on the electrical terminal connections.
Carefully fold the wires back into the ceiling rose or junction box, ensuring they are not pinched, bent at sharp angles, or crushed. Align the socket base with the mounting holes and secure it firmly using the mounting screws.
Step 4: Reassemble, Restore Power, and Test the Light
With the new socket securely wired and mounted, you can begin the final reassembly. Reattach any decorative covers, shades, or locking rings that you removed earlier.
Before inserting a bulb, check the manufacturer’s label on the new E27 socket for its maximum wattage rating (typically expressed as “Max 60W” or similar). Ensure your chosen bulb does not exceed this limit, as overpowering a socket can cause excessive heat buildup, melting the plastic or posing a fire hazard. Screw the E27 bulb firmly into the new socket, ensuring it sits straight and makes solid contact with the internal terminals.
Return to your distribution board (DB box) and flip the circuit breaker back to the “ON” position. Walk back to the light fixture and flip the wall switch. The light should turn on immediately and shine steadily.
Observe the fixture closely for a few minutes. Check for any unusual signs, such as flickering, buzzing sounds, or faint burning odors. If you notice any of these anomalies, turn off the wall switch immediately, return to the DB box to isolate the power, and re-verify all your connections.
Troubleshooting Common Post-Installation Issues
If your newly installed E27 light fixture does not function perfectly, do not panic. Most issues stem from minor, easily correctable installation errors. Always remember to isolate the power at the DB box and verify the circuit is dead before attempting any troubleshooting steps.
- The bulb does not light up: First, verify that the bulb itself is functional by testing it in a known working lamp. Next, ensure the circuit breaker has not tripped again. If the bulb and breaker are fine, isolate the power and check that the wire connections inside the socket terminals are tight and that the insulation is not accidentally clamped under the terminal screws instead of the bare copper.
- The light flickers or hums: This often indicates a loose neutral wire connection or compatibility issues with a dimmer switch. If your wall switch is a dimmer, ensure both the new E27 bulb and the socket are rated for dimming. Non-dimmable LED bulbs installed on a dimming circuit will flicker or buzz continuously.
- The bulb fits loosely: Some budget E27 sockets have low-quality contact tabs at the bottom. If the bulb is not making contact, isolate the power, remove the bulb, and use a small insulated screwdriver to gently pry the center brass tab upward slightly to ensure a firm connection with the bulb base.
Frequently Asked Questions (FAQ)
Can I replace a bayonet (B22) socket with an E27 socket?
Yes, you can replace an older bayonet (B22) socket with an E27 socket, but you must replace the entire socket fixture rather than using temporary adapters. While B22-to-E27 plug-in adapters are widely available on online marketplaces, they are not recommended for permanent, fixed household wiring. These adapters add physical length and weight to the fixture, which can strain pendant cords, and they can introduce additional electrical resistance, leading to localized heat buildup. A complete, like-for-like fixture replacement is always the safest and most reliable long-term solution.
Do I need an earth wire for an E27 socket?
Whether you need an earth wire depends entirely on the construction material of your new E27 socket. If you are installing a metal socket (Class I appliance), an earth wire is legally and physically mandatory to prevent the metal exterior from becoming live in the event of an insulation fault. If you are installing a plastic or ceramic socket (Class II double-insulated appliance), an earth terminal is not provided because the housing cannot conduct electricity. If your ceiling or wall box contains an existing earth wire but your new plastic socket does not have a terminal for it, do not cut or discard the wire. Terminate the bare end safely in a screw terminal block or wrap it in electrical tape, then tuck it away inside the junction box so it remains available for future metal fixtures.

Community discussion
Share your experience or ask a question. Comments are reviewed before publication.