
Mounting a Kodak WiFi digital frame on your wall transforms a static living space into a dynamic gallery of personal memories. Unlike traditional photo frames, a digital frame requires careful planning regarding power access, wall stability, and wireless connectivity. To achieve a clean, professional look, you must select the right mounting hardware for your specific wall type, secure the frame safely, and configure the software settings to connect seamlessly with your home network. This guide provides a comprehensive walkthrough of the entire process, from drilling the first hole to inviting family members to share their favorite photos.
Preparing for Wall Installation
Before picking up a drill, take a close look at the back of your Kodak digital frame to understand its mounting options. Most models feature built-in keyhole slots designed for portrait or landscape orientation, while some larger or premium models may support standard VESA mounting patterns. Refer to your product manual to verify the exact dimensions and weight of the frame, as this determines the load-bearing requirements for your wall fasteners.
The composition of your wall is the most critical factor in choosing the correct mounting hardware. In Singapore, residential properties like HDB flats and condominiums predominantly feature reinforced concrete, precast concrete panels, or solid brick walls. These materials require a rotary hammer drill, masonry drill bits, and plastic wall plugs (anchors) to ensure a secure hold. If you are mounting the frame on a drywall partition, which is more common in office spaces or newer home renovations, you must use specialized hollow-wall anchors or locate a wooden stud behind the plasterboard.
Products mentioned in this guide

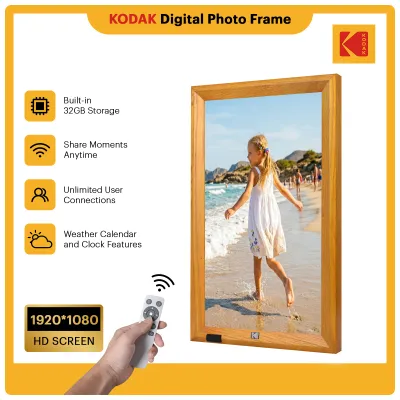
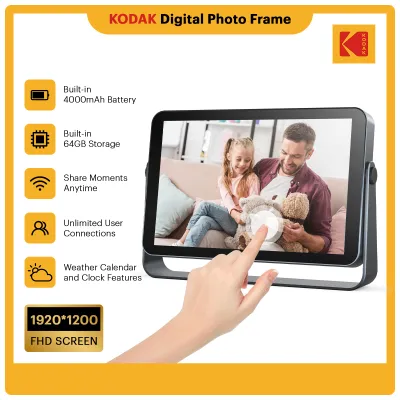




Prices are valid at publication and may change. Please refer to the product page for the latest price.
Gather all necessary tools before starting the installation. You will need a reliable power drill, a spirit level to prevent a crooked display, a measuring tape, a pencil for marking drill points, a screwdriver that matches your mounting screws, and safety goggles. Additionally, having a stud finder with an integrated live-wire detector is highly recommended.
Safety must be your top priority when drilling into any wall. Always check for hidden electrical conduits, water pipes, or gas lines behind your chosen mounting spot. In Singaporean homes, electrical wiring typically runs vertically or horizontally from light switches and power sockets. Avoid drilling directly in line with these fixtures. If you are uncertain about what lies behind the wall, or if you are working near a bathroom or kitchen wall where plumbing is likely, use a digital wall scanner or consult a qualified professional handyman to avoid costly and dangerous utility damage.
Step-by-Step Wall Mounting Process
Once you have verified the safety of your chosen location, use your measuring tape to determine the ideal height for the frame. For optimal viewing comfort, the center of the digital frame should sit approximately at eye level, which is generally between 1.4 and 1.5 meters from the floor. Hold the frame or its dedicated mounting bracket against the wall at this height, place a spirit level on top of it, and adjust until the bubble is perfectly centered. Use a pencil to mark the exact locations of the screw holes through the keyhole slots or bracket templates.

With your markings in place, select a drill bit that matches the diameter of your wall plugs. For concrete walls, set your power drill to hammer mode and hold it perpendicular to the wall. Drill a pilot hole slightly deeper than the length of the plastic wall plug to ensure it can sit completely flush. Vacuum or blow out the dust from the hole before inserting the wall plug. Gently tap the plug into the hole with a hammer until it is level with the wall surface.
Next, insert the screws into the wall plugs. If your Kodak frame mounts directly via keyhole slots on the back panel, drive the screws in but leave a small gap of approximately 2 to 3 millimeters between the screw head and the wall. This gap allows the keyhole slots to slide over the screw heads and drop down securely into the locked position. If you are using a VESA bracket, secure the bracket tightly against the wall with the screws, ensuring there is no wobble or play.
Carefully lift the digital frame, align the mounting slots on the back with the wall screws or bracket, and gently slide it downward until you feel it lock into place. Slowly release your grip while keeping your hands close to the frame to verify its stability. If the wall material crumbles during drilling, if the wall plugs fail to grip tightly, or if the frame feels loose on the wall, remove the frame immediately. Do not leave it unattended. In such cases, the wall material may be compromised, and you should consult a qualified professional to assess the wall and complete the installation safely.
Powering and Connecting to WiFi
A wall-mounted digital frame requires a continuous power supply to display your photos. To maintain a clean, minimalist aesthetic, you must plan how to manage the power cable. Running a bare wire down the wall can look untidy. Consider using self-adhesive plastic cable trunking (concealer channels), which can be purchased for around S$5 to S$15 at local hardware stores and painted to match your wall color. Route the cable neatly through the channel down to the nearest electrical outlet, ensuring the cable is not pulled taut or pinched.
Plug the power adapter into the wall outlet. In Singapore, the standard domestic voltage is 230V at 50Hz, and appliances must use a compatible plug. Ensure your frame’s power adapter carries the appropriate electrical safety certifications, such as the Safety Mark, to guarantee safe operation. Switch on the power outlet and press the power button on the frame if it does not boot automatically. The screen should light up and display the initial startup wizard.
Use the frame’s touchscreen interface or the included remote control to navigate the setup menu. Select your preferred language and proceed to the network settings screen. The frame will scan for nearby wireless networks. Select your home WiFi network from the list. Enter your wireless password carefully using the on-screen keyboard, paying close attention to uppercase and lowercase letters.
If the frame struggles to connect or fails to find your network, check your router’s specifications. Many smart home devices and digital frames, including several Kodak models, are designed to connect specifically to 2.4GHz WiFi bands and do not support 5GHz bands. If you have a dual-band router that merges both frequencies under a single network name (SSID), you may need to access your router’s admin settings to temporarily split the bands or enable a dedicated 2.4GHz guest network for the frame.
Configuring Settings and Adding Photos
With the frame online, take a few moments to optimize the display settings for your room’s environment. Navigate to the settings menu to adjust the screen brightness. If the room receives direct sunlight, you may need a higher brightness level, whereas a dimmer setting is preferable for cozy evening lighting to avoid harsh glare. Set up an automated sleep schedule so the frame turns off during the night (for example, from 11:00 PM to 7:00 AM) to save electricity and extend the lifespan of the display panel. You can also configure the slideshow transition speed and choose between random or chronological photo playback.
To begin displaying your photos, download the official companion app recommended in your Kodak frame’s user manual (typically available on major mobile app stores) onto your smartphone or tablet. Open the app, create a user account, and select the option to add a new frame. The digital frame will display a unique activation or pairing code on its screen. Enter this code into the mobile app to link your device to the frame securely.
Once paired, you can upload photos directly from your mobile device’s gallery. The app allows you to select multiple images, crop them to fit the frame’s aspect ratio, and send them instantly over the cloud. You can organize your uploaded media into distinct albums, such as family vacations, holidays, or seasonal themes, and select which album to display.
One of the best features of a WiFi-enabled frame is collaborative sharing. Through the companion app, you can invite family members and friends to connect to your frame by sharing its unique frame ID or email address. Once they accept the invitation, they can upload photos directly to your wall-mounted frame from their own devices, making it an excellent way to stay connected with loved ones living abroad.
Maintenance and Safety Checks
To ensure your wall-mounted digital frame remains a safe and beautiful addition to your home, establish a routine for basic maintenance and safety checks. Periodically inspect the physical mounting points. Over time, minor vibrations or changes in indoor humidity—especially in Singapore’s tropical climate—can affect wall anchors or cause screws to loosen slightly. Gently wiggle the frame to ensure it remains firmly anchored to the wall.
When cleaning the screen, always use a dry, clean microfiber cloth to wipe away dust and fingerprints. Avoid using paper towels, tissues, or rough cloths, which can scratch the delicate screen surface. Never use harsh chemical cleaners, alcohol-based solvents, or glass cleaners, and never spray any liquid directly onto the frame. If a stubborn spot requires moisture, slightly dampen the microfiber cloth with distilled water, wipe the screen gently, and dry it immediately with a dry section of the cloth.
Regularly check the power cable and adapter to ensure they are not under physical tension, bent at sharp angles, or pinched behind furniture. The cable should hang naturally without pulling on the frame’s power port. Ensure the power outlet and adapter are kept free of dust buildup and are not exposed to moisture or high heat sources, such as direct sunlight near a window or proximity to air conditioning vents that might produce condensation.
There are specific conditions under which you should unplug and temporarily remove the frame from the wall. If you experience severe electrical storms with a risk of power surges, plan to leave your home unoccupied for an extended vacation, or notice any signs of wall moisture, water seepage, or unusual heat coming from the frame or adapter, disconnect the power immediately and store the frame in a safe, dry place.
Frequently Asked Questions (FAQ)
Can I mount the frame without drilling holes?
Yes, you can use heavy-duty adhesive strips or picture-hanging hooks designed for damage-free mounting, which is a popular choice for rental properties where drilling is restricted. However, you must exercise extreme caution. Adhesive performance depends heavily on the weight of the frame, the texture of your wall paint, and environmental factors like humidity. In warm, humid climates, adhesives can degrade over time, posing a risk of the frame falling and sustaining permanent damage. For a secure, long-term installation of any wall-mounted electronic device, mechanical fasteners like screws and wall plugs are the only reliable and safe choice.
What should I do if the frame won't connect to my WiFi?
If your frame fails to connect, start by restarting both the digital frame and your home router to clear any temporary network glitches. Verify that your router’s SSID (network name) is visible and that you are entering the correct password. Ensure the frame is within a reasonable range of your router; thick concrete walls, common in Singaporean homes, can significantly degrade WiFi signals. If the signal is weak, you may need to install a WiFi range extender or temporarily move the frame closer to the router during the initial setup process to establish a stable connection.

Community discussion
Share your experience or ask a question. Comments are reviewed before publication.