
Nasonik LED ceiling lights are generally well-suited for standard Singapore HDB flats with a 2.6-metre ceiling height, provided you select low-profile flush mount models and verify their physical dimensions before purchase. Because a 2.6-metre ceiling leaves limited vertical clearance once you account for average human height and furniture, bulky or deeply suspended fixtures can make a room feel cramped and claustrophobic. By focusing on ultra-slim flush mount models and verifying key technical specifications, you can achieve a bright, open, and visually comfortable living space.
When selecting lighting for a standard HDB flat, the goal is to balance functional illumination with spatial harmony. A well-chosen ceiling light should blend seamlessly into the ceiling plane, providing ample light distribution without drawing attention to the physical limitations of a lower ceiling. Understanding how to evaluate fixture dimensions, light output, and installation requirements will ensure your chosen Nasonik LED light enhances your home’s interior design while maintaining a safe and comfortable environment.
Spatial Rules for 2.6m HDB Ceilings
Standard HDB flats built in recent decades typically feature a floor-to-ceiling height of approximately 2.6 metres. This height imposes strict physical and visual boundaries on any ceiling-mounted fixture to ensure safety, comfort, and an open atmosphere. To maintain a safe and comfortable living environment, the bottom of any ceiling fixture should ideally sit at least 2.1 to 2.3 metres above the finished floor level. This leaves a maximum allowable fixture drop of 30 to 50 centimetres, though a much shallower profile is highly preferred to maximize visual clearance.
Products mentioned in this guide
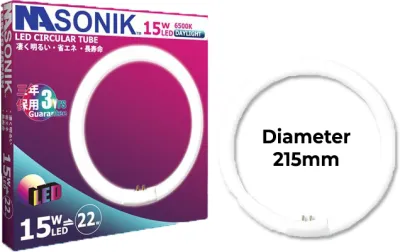
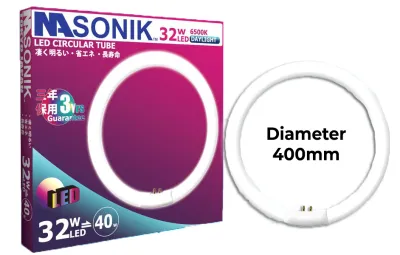
Prices are valid at publication and may change. Please refer to the product page for the latest price.
For main living areas, a fixture thickness of 5 to 10 centimetres is optimal. This ultra-low profile keeps the light source close to the ceiling plane, drawing the eye upward and making the room appear taller than it is. When a fixture protrudes too far down, it creates a visual obstacle that lowers the perceived height of the room, making the space feel confined.
Visual weight and diameter are equally important when selecting a ceiling light. A fixture that is too wide can overwhelm a small HDB room, while one that is too small will look disproportionate and fail to provide adequate light. For a standard HDB bedroom measuring approximately 9 to 12 square metres, a fixture diameter of 30 to 40 centimetres is visually balanced. For larger living rooms measuring 20 to 25 square metres, a diameter of 50 to 60 centimetres works well, provided the profile remains exceptionally slim.
Heat dissipation is another critical factor for low-ceiling installations, where restricted airflow near the ceiling surface can cause heat to build up. Enclosed or semi-enclosed LED fixtures must have efficient thermal management to prevent premature degradation of the LED chips and driver. Look for models with aluminum backplates or dedicated heat sinks that allow heat to dissipate laterally. Proper heat dissipation ensures the fixture operates safely and maintains its light output over its lifespan.
How to Evaluate Nasonik LED Light Specifications
When browsing Nasonik LED lights, do not rely solely on product photos, which are often taken in high-ceiling showrooms. Instead, equip yourself with a practical checklist to verify if a specific model’s label and specifications fit the 2.6-metre constraint.

First, check the exact dimensions of the fixture. Distinguish between true flush mounts, which sit flat against the concrete slab, and semi-flush mounts, which hang down via a short stem or bracket. For a 2.6-metre ceiling, true flush mounts are almost always the safer choice. Avoid any model with a total drop exceeding 15 centimetres unless it is positioned directly over a permanent furniture piece like a dining table or kitchen island.
Second, match the lumen output and beam angle to the room’s square footage. In a low-ceiling environment, light does not have much distance to spread before reaching the floor or work surfaces. A beam angle that is too narrow, such as under 90 degrees, will create harsh, spotlight-like cones of light and deep shadows in the corners of the room. Look for fixtures with a wide beam angle of 120 degrees or more to ensure even, diffused ambient light across the entire space.
As a general guideline, aim for 300 to 400 lumens per square metre for task areas like kitchens, and 150 to 200 lumens per square metre for bedrooms and living areas. Over-illuminating a low-ceiling room can cause intense rebound glare off light-coloured floors and walls, leading to visual discomfort. Dimmable models are highly recommended, as they allow you to adjust the brightness to suit different times of day and activities.
Third, evaluate the diffuser material and optical design. Because the light source is physically closer to your eyes in a low-ceiling room, direct glare is a major risk. High-quality PMMA (polymethyl methacrylate) or frosted polycarbonate diffusers scatter light evenly, hiding individual LED hot spots and reducing eye strain. Avoid fixtures with clear or minimally frosted covers that expose the bare LED diodes, as these can cause uncomfortable glare when you look upward.
Room-by-Room Selection Guide for HDB Flats
Each room in an HDB flat serves a different function and has unique spatial dynamics, requiring a tailored approach to selecting Nasonik LED ceiling lights.
In living and dining areas, balancing ambient lighting with low-profile designs is key to keeping the communal space feeling open. A large, ultra-slim circular or rectangular Nasonik flush mount with a thickness under 8 centimetres provides excellent ambient light without encroaching on the physical space. If you have a dining table, a slightly lower semi-flush mount can define the dining zone, but ensure it is positioned directly over the table where people do not walk, keeping the bottom of the fixture at least 75 to 90 centimetres above the tabletop.
In bedrooms, visual comfort is paramount because you spend time lying down and looking directly at the ceiling. A low-glare, dimmable Nasonik flush mount is ideal. Look for models with a backlight or halo effect that casts a soft glow onto the ceiling itself. This design softens the contrast between the bright fixture and the dark ceiling, reducing eye fatigue and creating a relaxing atmosphere.
In kitchens and bathrooms, environmental factors like moisture, grease, and steam must be addressed. Verify the Ingress Protection (IP) rating of the fixture. For bathrooms, a minimum of IP44 is recommended to protect against moisture intrusion from showers. In kitchens, a sealed flush mount prevents grease and dust from accumulating inside the diffuser, making cleanup much easier. Keep profiles exceptionally slim here, as overhead cabinets and open doors can easily collide with bulky fixtures.
Installation Clearances and Electrical Checks
Installing lights on low HDB ceilings requires careful attention to physical mounting requirements and safety boundaries.
Standard HDB ceilings are made of reinforced concrete. Installing a flush mount light requires drilling into the slab and using appropriate wall plugs and screws. Verify the weight of the Nasonik fixture; while most LED flush mounts are lightweight, heavier decorative models must be securely anchored to prevent them from loosening over time. Ensure the mounting bracket sits perfectly flat against the concrete to avoid any gaps.
HDB flats often have surface-mounted plastic conduit or shallow internal junction boxes. If the junction box protrudes from the ceiling, a completely flat-backed fixture may not sit flush, leaving an unsightly gap where dust and insects can gather. Check if the Nasonik fixture has a recessed mounting bracket or a hollow backplate designed to accommodate standard Singapore junction boxes and wire connectors.
Ensure there is sufficient room inside the fixture’s canopy or housing to tuck away the electrical wires and connectors. Cramming wires into a tight space can pinch the insulation, leading to short circuits, or restrict airflow around the LED driver, causing localized overheating. Always isolate the mains power at the distribution board before attempting any electrical work.
While replacing a simple light fixture can be a DIY task for those with basic electrical knowledge, complex installations—such as running new wiring, installing heavy fixtures, or working in damp zones like bathrooms—should always be handled by an Energy Market Authority (EMA) licensed electrician to ensure compliance with Singapore’s electrical safety standards.
Frequently Asked Questions (FAQ)
Do Nasonik LED lights require special transformers for HDB wiring?
Singapore’s residential electrical grid operates at a standard voltage of 230V AC at 50Hz. Most modern Nasonik LED ceiling lights designed for the local market come with integrated or pre-wired LED drivers that accept this standard input directly, eliminating the need for external transformers. However, you must verify whether the driver is built into the fixture’s chassis or if it is an external block. For ultra-slim flush mounts, an integrated driver is highly convenient as it requires no extra ceiling cavity space. If the model uses an external driver, ensure there is a designated recess within the fixture’s mounting bracket to house it safely without pinching the wires.
Can I install a Nasonik ceiling light directly over an HDB ceiling fan?
No, installing a ceiling light directly above or too close to a ceiling fan is highly discouraged in a 2.6-metre HDB flat. Doing so creates a severe strobe effect as the spinning fan blades repeatedly interrupt the light path, which can cause headaches, eye strain, and spatial disorientation. To avoid this, maintain a minimum horizontal clearance of at least 1.5 metres between the outer edge of the fan blades and the light fixture. Additionally, because a 2.6-metre ceiling height is already low, combining a ceiling fan and a separate ceiling light in the same central zone is physically impractical; instead, consider an integrated ceiling fan with a built-in LED light kit, or use wall-mounted sconces and track lighting along the perimeter of the room to supplement the ambient light.

Community discussion
Share your experience or ask a question. Comments are reviewed before publication.