
Selecting the ideal Kodak digital frame for wall display in a Singapore home requires balancing spatial constraints, aesthetic preferences, and technical specifications. Because Singaporean living spaces—such as Housing & Development Board (HDB) flats and private condominiums—often feature distinct layouts, concrete walls, and specific lighting conditions, a successful installation depends on careful planning. By evaluating how a frame’s size, mounting options, and power requirements align with your specific room, you can create a clean, gallery-style display that enhances your home decor without cluttering your living space.
To make the right choice, you must verify the physical mounting compatibility of the frame, assess the ambient light in your room, and plan a safe cable management route. This guide outlines the essential steps to evaluate Kodak’s digital frame features, prepare your wall for installation, and select a model that fits seamlessly into your Singaporean home.
Key Factors for Wall-Mounting Digital Frames in Singapore Homes
When planning a wall-mounted digital frame display, the physical dimensions of your room dictate the maximum comfortable screen size. In typical Singaporean apartments, living rooms and bedrooms have defined viewing distances. Placing a massive screen in a narrow hallway or a small study can overwhelm the eye and make the digital pixels visible. Conversely, a small frame mounted on a large feature wall may look lost and insignificant. For most standard HDB living rooms, a screen size between 10 and 13 inches offers a balanced presence, allowing family photos to be clearly visible from a distance of two to three meters.
Products mentioned in this guide

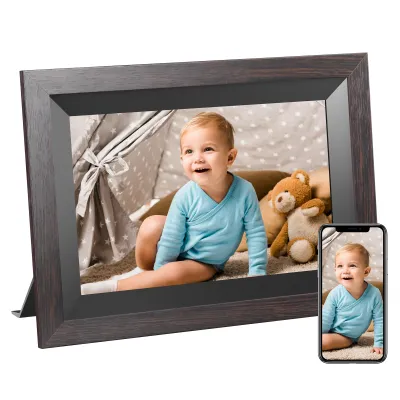
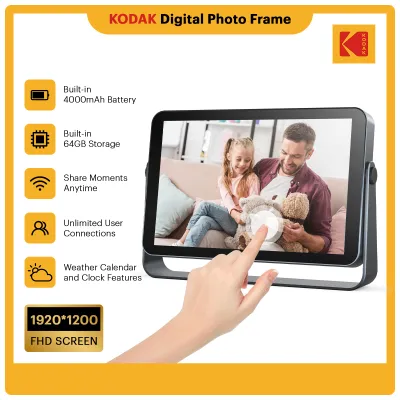


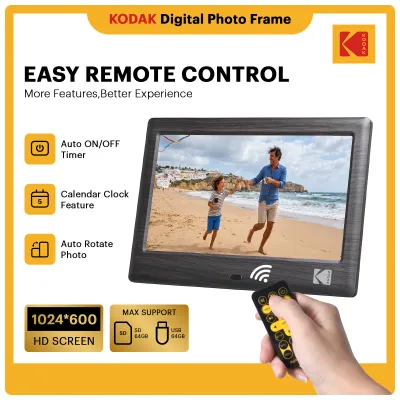
Prices are valid at publication and may change. Please refer to the product page for the latest price.
Ambient lighting is another critical factor that influences where you should mount your digital frame. Singapore’s tropical climate brings intense natural light through large windows, sliding balcony doors, and open layouts. This bright environment can cause severe glare on glossy screen surfaces, washing out colors and making images difficult to see. Before drilling any holes, observe how light moves through your room during the day. Avoid mounting the frame directly opposite large windows or under bright, unshielded downlights. If your chosen wall receives direct sunlight, look for Kodak models that feature anti-glare screen coatings or adjustable brightness levels to maintain image clarity.
Power outlet proximity is a practical constraint that many homeowners overlook until the frame is ready to be hung. Unlike traditional photo frames, digital frames require a continuous power supply to function. This means a power cable will run from the back of the frame to the nearest electrical outlet. In Singapore homes, outlets are typically positioned near the floor or behind media consoles. If you plan to mount the frame at eye level, you must account for the length of the included power cord and how you intend to manage the visible wire. Choosing a wall location close to an existing outlet, or planning the display around existing furniture like a sideboard, can help minimize the visual impact of the power cable.
Evaluating Kodak Digital Frame Features for Wall Display
To ensure a seamless wall-mounting experience, you must verify the physical mounting mechanisms of the specific Kodak model you are considering. Not all digital frames are designed with wall mounting in mind; some are strictly intended for tabletop use with integrated kickstands. When reviewing product specifications, look for built-in keyhole slots on the back of the frame casing. These slots allow the frame to hang flush against a screw secured in the wall. Alternatively, check if the model supports standard VESA mounting patterns, which allow you to use third-party articulated brackets for adjustable viewing angles.

An auto-orientation sensor is an indispensable feature for any wall-mounted digital display. Depending on your wall layout and the orientation of your photo collection, you may want to hang the frame in a horizontal (landscape) or vertical (portrait) position. A frame equipped with a gravity sensor or auto-rotation feature will automatically detect its physical orientation and adjust the image layout accordingly. This prevents you from having to manually crop or rotate every photo before uploading it, ensuring that your gallery always looks professional and correctly aligned.
Managing screen brightness is essential for both visual comfort and energy efficiency. A screen that is perfectly legible during a bright Singapore afternoon can become blindingly bright in a darkened room at night. When selecting a Kodak frame, verify whether the model includes an integrated ambient light sensor. This sensor automatically dims the screen when the room darkens and brightens it when the lights are turned on. If an automatic sensor is not available, check if the frame’s software allows you to program a customized sleep schedule, turning the display off completely during sleeping hours to conserve power and extend the lifespan of the screen.
Wi-Fi and cloud connectivity significantly improve the usability of a wall-mounted frame. Once a frame is securely fixed to a wall, taking it down to insert an SD card or a USB flash drive is inconvenient and increases the risk of dropping the device. Models featuring wireless connectivity allow you to upload new photos remotely using a dedicated smartphone application, email, or cloud storage platforms. This is particularly beneficial for families who want to share photos instantly from different locations, keeping the wall display dynamic and updated without any physical hassle.
Installation and Safety Checks for Wall Display
Before mounting your digital frame, you must identify the construction material of your wall to select the correct hardware. Most internal walls in Singaporean HDB flats and condominiums are constructed from solid concrete, structural precast panels, or lightweight drywall. Mounting a frame on concrete requires a rotary hammer drill, masonry drill bits, and plastic wall plugs (anchors) to secure the screws. For drywall partitions, you must use specialized hollow-wall anchors or toggle bolts to prevent the frame’s weight from pulling the screws out of the plasterboard. Never rely on simple adhesive strips or double-sided tape for wall-mounting digital frames, as the heat generated by the device can degrade the adhesive over time, leading to a costly fall.
Cable management is crucial for maintaining a clean, professional aesthetic. A dangling black power cord can instantly ruin the look of a carefully curated wall display. One of the most common and non-destructive solutions in Singapore is using paintable plastic cable trunking. These slim profiles can be adhered to the wall and painted to match your wall color, making the wire virtually invisible. Alternatively, you can route the cable behind adjacent furniture, such as a tall bookshelf or a display cabinet, to keep it out of sight. If you are renting your home, ensure that any cable management solution you choose can be removed without damaging the wall paint or plaster.
Recognizing the limits of your DIY skills is essential for a safe installation. If your chosen mounting location requires drilling into structural concrete walls—especially near electrical conduits, water pipes, or within HDB household shelters (bomb shelters) where drilling is strictly regulated—it is best to stop and consult a qualified professional. Furthermore, if you wish to install a recessed power outlet directly behind the frame for a completely wireless look, you must hire a licensed electrical worker certified by the Energy Market Authority (EMA) in Singapore. Attempting unauthorized electrical modifications or drilling blindly into walls can result in severe electrical hazards, structural damage, or voiding your home insurance.
Step-by-Step Selection Checklist
- Step 1: Define your primary display goal. Determine whether you want the frame to act as a static art piece displaying high-resolution landscapes, or a dynamic, frequently updated slideshow of family memories. This will guide your choice of screen resolution and connectivity features.
- Step 2: Measure your wall space and calculate the viewing distance. Use these measurements to select a screen size that fits harmoniously within your room layout. Remember to account for the physical bezel width, as some Kodak models feature wider, decorative frames that increase the overall footprint.
- Step 3: Match the frame's aesthetic to your interior decor. Kodak offers frames with various bezel materials, including classic wood finishes and modern matte plastics. Choose a style that complements your existing furniture, keeping in mind that decorative style is a matter of personal preference rather than performance.
- Step 4: Verify electrical compatibility and safety certifications. Ensure the power adapter is rated for Singapore's standard voltage of 230V at 50Hz and carries the appropriate safety certifications, such as the Singapore Safety Mark. Additionally, confirm that the package includes a compatible Type G three-pin plug to avoid the need for bulky, unsightly adapters on your wall.
- Step 5: Confirm local warranty and support. Purchase your frame from authorized local retailers in Singapore to ensure you receive a valid local warranty. This guarantees access to reliable after-sales support and genuine replacement parts should any technical issues arise.
Frequently Asked Questions (FAQ)
Do all Kodak digital frames support wall mounting?
No, not all Kodak digital frames are designed for wall mounting. Some models are engineered exclusively for tabletop display and lack the necessary physical interfaces, such as keyhole slots or VESA mounting holes, on their rear casing. Before making a purchase, always review the product’s official specification sheet to confirm its mounting compatibility. Avoid attempting to modify a tabletop-only frame by drilling custom holes or gluing external hangers to the casing, as this can damage the internal electronics, create safety hazards, and void the manufacturer’s warranty.
How do I hide the power cord for a wall-mounted digital frame?
Hiding the power cord can be achieved through several practical methods depending on your living situation. For a non-destructive option suitable for rental homes, use paintable plastic cable trunking that matches your wall color, or strategically position the frame above a sideboard, console table, or shelving unit to block the wire from view. If you own your home and are undergoing renovations, you can hire a licensed electrical worker to install a recessed power outlet directly behind the mounting spot. This allows the power adapter to sit flush inside the wall cavity, completely concealing the cord and creating a clean, floating gallery appearance.

Community discussion
Share your experience or ask a question. Comments are reviewed before publication.