
Creating a wall-mounted gallery display is an exceptional way to personalize your living space, but selecting the right framing material is critical to both the aesthetic outcome and the safety of your home. Acrylic photo frames have emerged as a premier choice for modern interiors, offering a sleek, minimalist aesthetic that traditional wood or metal frames cannot replicate. Unlike heavy glass, acrylic is lightweight, highly shatter-resistant, and provides exceptional optical clarity, making it ideal for large-scale displays or high-traffic areas. However, because the market is flooded with varying grades of plastics, identifying which brands offer true gallery-grade quality requires a systematic approach to evaluation.
When building a premium gallery wall, you cannot rely solely on brand names or generic product descriptions. Many mass-market options use thin, low-grade plastics that warp, yellow, or scratch under normal environmental conditions. To secure a display that remains pristine for years, you must evaluate frames based on material composition, optical treatments, structural engineering, and mounting hardware. This guide establishes a clear framework for assessing acrylic photo frame brands, helping you identify high-quality options that protect your cherished prints while elevating your interior decor.
Key Quality Indicators for Acrylic Frames
To distinguish high-quality acrylic frames from cheap plastic substitutes, you must first understand the physical and optical properties of premium polymethyl methacrylate (PMMA). Optical clarity is the most immediate indicator of quality. Premium acrylic should offer a light transmission rate of approximately 92%, which is equivalent to or greater than that of standard window glass. When evaluating brands, look for those that specify the use of optical-grade acrylic, which ensures the material is free from internal impurities, bubbles, or a bluish-green tint that can distort the colors of your artwork.
Products mentioned in this guide



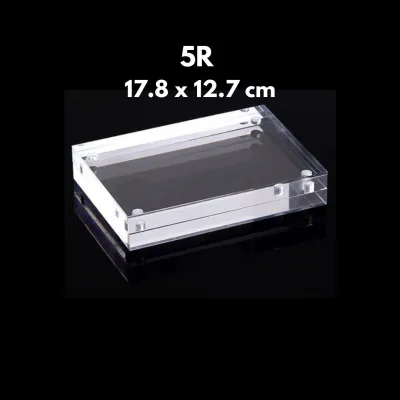


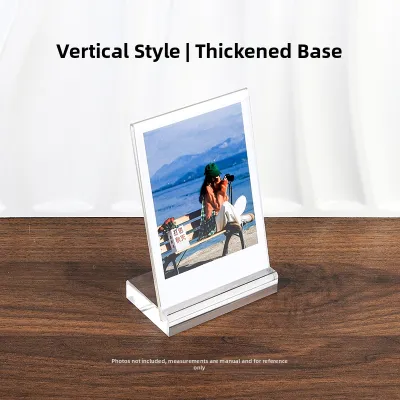

Prices are valid at publication and may change. Please refer to the product page for the latest price.
Reflectivity is another critical factor in a gallery setting. Standard acrylic is highly reflective, which can create distracting glare under direct sunlight or bright overhead spotlights. High-end framing brands often offer specialized anti-reflective (AR) or non-glare coatings. These coatings work by either chemically altering the surface to minimize light bounce or using a matte finish that gently scatters light. While matte finishes reduce glare, they can slightly soften the image contrast if the acrylic is not flush against the print, so verify the frame design before choosing this option.
Material thickness directly dictates the structural integrity of the frame. Thin acrylic panels—typically under 2mm—are highly susceptible to bowing or warping over time, especially when exposed to changes in temperature and humidity. For a professional wall gallery, prioritize brands that use panels with a minimum thickness of 3mm for smaller prints, and up to 4.5mm or 6mm for larger formats. Additionally, examine the edge treatment of the panels. Premium brands utilize diamond-polishing techniques to achieve perfectly flat, crystal-clear, and light-refracting edges, whereas lower-grade options often feature rough, cloudy, or flame-polished edges that may exhibit slight ripples.
Finally, long-term preservation requires robust UV protection and archival safety. Standard ambient light contains ultraviolet rays that gradually degrade paper fibers and fade photographic inks. While standard acrylic naturally filters a portion of UV light, gallery-grade acrylic is chemically formulated to block up to 99% of UV rays. Ensure the brand explicitly states its UV-filtering capabilities and confirms that any backing boards, mats, or spacers included with the frame are acid-free and chemically inert to prevent off-gassing from damaging your prints.
Evaluating Brands for Gallery-Grade Durability
When searching for reliable acrylic frame brands on online marketplaces or specialized decor sites, the manufacturing process of the acrylic is a primary indicator of durability. Acrylic is produced as either cell-cast or extruded sheets. Cell-cast acrylic is manufactured by pouring liquid monomer into glass molds, resulting in a high molecular weight material that is exceptionally rigid, highly scratch-resistant, and easy to clean without clouding. Extruded acrylic, while more cost-effective, is softer, more prone to scratching, and has a lower thermal stability, making it more likely to warp on a warm wall. Brands targeting professional collectors will openly specify the use of cell-cast acrylic in their product documentation.

Mounting hardware is another area where premium brands distinguish themselves from budget alternatives. A gallery-grade frame should feature robust, precision-engineered hanging systems rather than flimsy plastic tabs or adhesive strips. Look for brands that supply solid brass, stainless steel, or anodized aluminum standoffs or cleat systems. The manufacturer should provide clear weight capacity declarations for their hardware, ensuring that the mounting system can easily support the weight of both the acrylic panels and the enclosed artwork over years of suspension.
To filter out low-quality options, learn to differentiate between general home decor brands and professional gallery suppliers. General decor brands often use vague marketing terms such as “shatterproof glass alternative” or “clear plastic frame” without providing technical specifications. In contrast, professional suppliers provide comprehensive product data sheets detailing the exact acrylic brand used, precise panel dimensions, weight, UV filtration percentages, and detailed installation schematics. Prioritizing brands that maintain this level of material transparency ensures you are investing in a product engineered for longevity.
Wall Mounting and Safety Considerations
Installing a gallery wall requires careful planning to ensure the structural safety of your home and the protection of your artwork. Because acrylic is significantly lighter than glass, it reduces the overall load on your walls, but large-format double-panel frames can still carry substantial weight. Before drilling, estimate the total weight of the frame by checking the manufacturer’s specifications. A typical double-panel 50cm x 70cm acrylic frame with metal standoffs can weigh between 3kg and 5kg, requiring secure anchoring points rather than simple adhesive hooks.
In Singapore, residential wall construction varies significantly between partition walls and structural walls. Most structural walls in local HDB flats and condominiums are made of solid concrete or masonry, which provides excellent load-bearing capacity but requires specialized installation tools. To mount frames on concrete, you must use a rotary hammer drill equipped with a masonry drill bit, followed by inserting high-quality plastic wall plugs (such as size 6 or 8) to secure the mounting screws. For internal partition walls made of gypsum drywall, standard wall plugs are insufficient; instead, you must use heavy-duty threaded drywall anchors or toggle bolts that expand behind the board to distribute the weight safely.
Safety boundaries must be strictly observed during installation, particularly when working at height or drilling near utility lines. Always use a reliable stud finder with live-wire detection to locate and avoid hidden electrical conduits or water pipes before drilling into any wall. If your gallery layout involves oversized frames (exceeding 10kg), high-altitude installations near staircases, or complex multi-panel alignments, do not attempt a DIY installation. In these scenarios, it is highly recommended to hire a qualified local handyman or professional art installer who possesses the specialized leveling tools and heavy-duty anchoring hardware required to guarantee a secure, permanent mount.
Design and Layout Planning for Gallery Walls
An effective acrylic gallery wall relies on a thoughtful balance between the visual properties of the frames and the architectural layout of the room. Acrylic frames are highly celebrated for their ability to create a “floating” or frameless effect, where the wall color shows through the clear borders of the frame. When planning your layout, decide whether you prefer a formal, symmetrical grid or an asymmetrical, salon-style arrangement. Symmetrical grids work exceptionally well with uniform frame sizes and matching margins, creating a clean, clean-lined, and architectural look. Asymmetrical layouts offer more flexibility for mixed-size prints but require a consistent spacing interval—typically 5cm to 10cm between frames—to maintain visual cohesion.
Managing light reflectivity is a crucial design step that must be addressed before finalizing your frame placement. Because of the glossy surface of standard acrylic, placing a gallery wall directly opposite a large window or under unshielded halogen spotlights will result in harsh reflections that obscure the artwork. To mitigate this, position your gallery on a wall adjacent to natural light sources rather than directly opposite them. If you are designing a dedicated lighting system for your gallery, opt for adjustable LED track lights with diffusing lenses, and angle the light beams at approximately 30 degrees to minimize glare while evenly illuminating the display.
To avoid making permanent mistakes on your walls, utilize physical templates during the planning phase. Cut sheets of brown craft paper to the exact outer dimensions of each acrylic frame, marking the precise locations of the mounting holes or standoffs on the paper. Use low-tack painter’s tape to arrange these templates on your wall, allowing you to step back and evaluate the spacing, height, and overall balance of the layout. Once you are satisfied with the arrangement, you can drill directly through the marked points on the paper templates, ensuring perfect alignment without leaving unnecessary trial holes in your concrete or drywall.
Building Your Shortlist: What to Verify Before Buying
Before finalizing your purchase and investing in a set of acrylic frames, you must run through a practical verification checklist to ensure the products meet your specific display needs. First, carefully review the brand’s shipping and return policies. Because polished acrylic is highly susceptible to scratching and chipping during transit, reputable brands will ship their panels with protective paper or plastic masking film adhered to both sides of each panel. Verify that the seller offers a comprehensive damage-replacement policy that covers any scratches, cracks, or hardware defects discovered immediately upon unboxing.
Next, check the manufacturer’s product labels for specific cleaning and maintenance instructions. High-quality acrylic requires specialized care to maintain its optical clarity over time. Avoid brands that suggest using standard household glass cleaners, as these often contain ammonia or alcohol, which can chemically attack the acrylic polymer, causing micro-cracks known as “crazing” and leaving a permanent cloudy residue. A reliable brand will explicitly recommend using a soft microfiber cloth paired with a dedicated, non-abrasive acrylic cleaner or a mild solution of dish soap and water.
Finally, verify the exact dimensions of the frames on your shortlist. Acrylic frame listings can sometimes be confusing, as some brands list the outer dimensions of the physical acrylic panels, while others list the recommended print size. For floating frames where the print is sandwiched between two panels, the outer frame dimensions should ideally be 5cm to 10cm larger than the print itself to create the signature transparent border. Double-check these measurements against your paper wall templates to ensure that the physical frames will fit your planned layout perfectly without overlapping or crowding the space.
Frequently Asked Questions (FAQ)
Is acrylic safer than glass for large wall displays?
Yes, acrylic is significantly safer than traditional glass for large-scale wall displays. Acrylic possesses exceptional impact resistance, making it virtually shatterproof under normal household conditions. If an acrylic frame is accidentally dropped or knocked off the wall, it will not break into dangerous, sharp shards like glass, greatly reducing the risk of injury in homes with children or pets. Additionally, acrylic is approximately half the weight of standard glass, which places far less structural stress on your wall anchors and hanging hardware, making it a much safer choice for heavy, oversized gallery installations.
However, the primary trade-off for this safety and weight advantage is scratch resistance. While glass has a very hard surface that resists minor abrasions, acrylic is a softer material that can scratch easily if wiped with abrasive cloths or harsh cleaning agents. Therefore, while acrylic offers superior physical safety and structural advantages for large displays, it requires more mindful handling and specialized cleaning techniques to preserve its pristine, scratch-free surface over the long term.
How do I clean acrylic frames without causing scratches?
To clean acrylic frames without causing scratches, you must use a gentle, multi-step process and avoid common household cleaning tools. Never use paper towels, polyester cloths, or kitchen sponges, as their fibers are abrasive enough to leave microscopic scratches that will permanently dull the acrylic surface. Instead, always use a clean, high-pile microfiber cloth dedicated solely to cleaning your frames. Additionally, never use ammonia-based glass cleaners, alcohol, or solvents, as these chemicals will degrade the polymer and cause micro-cracking along the polished edges.
Begin the cleaning process by gently blowing away any loose dust or grit from the surface of the frame, or use a clean, dry microfiber cloth to lightly feather the dust off without applying pressure. Dragging dry dust particles across the acrylic is the most common cause of fine scratches. Once the loose dust is removed, spray a small amount of dedicated, anti-static acrylic cleaner or a highly diluted mixture of mild dish soap and lukewarm water onto the microfiber cloth—never directly onto the frame. Gently wipe the surface in straight, overlapping lines, then use a dry section of the cloth to buff away any remaining moisture.

Community discussion
Share your experience or ask a question. Comments are reviewed before publication.