
Selecting the best Nitecore emergency lights for a Housing & Development Board (HDB) flat during a power outage depends on matching specific light types—such as omnidirectional lanterns, directional flashlights, and hands-free headlamps—to the unique layout of your home. Because HDB flats feature compact utility spaces, narrow corridors, and multi-functional living areas, a single flashlight is rarely sufficient. Instead, a strategic combination of portable, high-efficiency LED lights ensures your household can safely navigate a blackout, perform essential tasks, and maintain comfort without relying on hazardous candles.
While power outages in Singapore are relatively rare, localized trips in your flat’s distribution board (DB) box or scheduled maintenance block outages can still plunge your home into darkness. Having a reliable, high-quality backup lighting system from a reputable brand like Nitecore ensures you are never left scrambling in the dark. By understanding how to evaluate key specifications and match different light designs to your flat’s rooms, you can build a highly effective emergency kit tailored to your living space.
Core Lighting Specifications for HDB Blackout Scenarios
When preparing for a blackout in an HDB flat, evaluating the lumen output and beam distance of your emergency lights is the first step. Lumens measure the total amount of visible light emitted by a source. For indoor emergency use, excessively high lumen outputs are often counterproductive, as intense light can bounce off light-colored HDB walls and cause harsh, blinding glare. A light source that offers adjustable brightness levels, ranging from a low 5-lumen mode for sleeping areas to a moderate 100 to 300 lumens for general living spaces, provides the most comfortable and versatile illumination.
Products mentioned in this guide
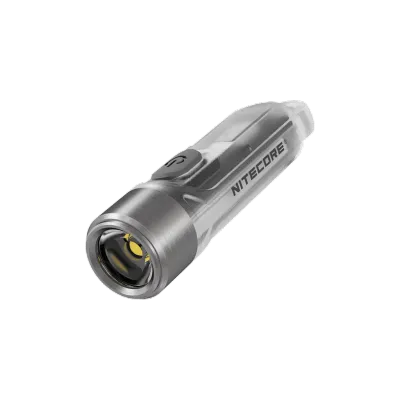
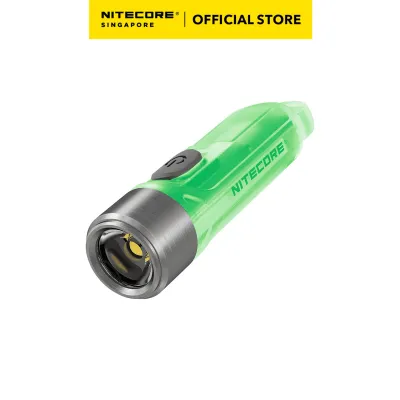
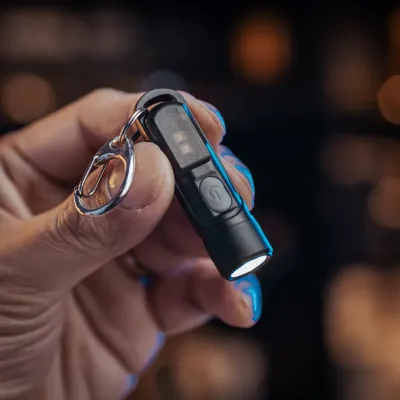
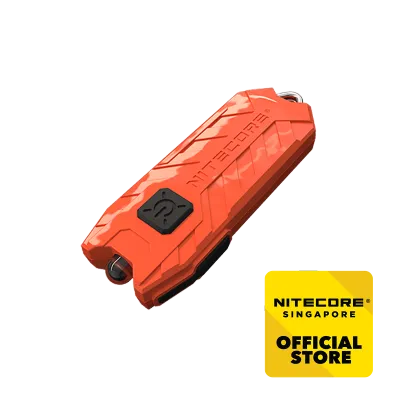
Prices are valid at publication and may change. Please refer to the product page for the latest price.
Beam distance and beam pattern are equally critical when selecting your backup lighting. Directional flashlights with a long “throw” or narrow beam are excellent for searching through deep cabinets or highlighting specific objects, but they perform poorly when trying to illuminate an entire room. For general area lighting, look for lights that offer a wide, diffused “flood” beam pattern. A diffused light spreads illumination evenly across a room, mimicking natural ambient light and reducing harsh shadows that can make navigating a cluttered space difficult.
Battery capacity and estimated runtime are the lifelines of any emergency light during an extended outage. When reviewing Nitecore product specifications, pay close attention to the runtime charts provided on the packaging or in the user manual. A reliable emergency light should be capable of running continuously for at least 8 to 12 hours on a medium setting, ensuring it can last through an entire night if necessary. Dual-fuel models, which can run on both rechargeable lithium-ion batteries and standard AA or AAA alkaline batteries, offer an extra layer of security by allowing you to swap in fresh cells when recharging is not an option.
Finally, consider the physical form factor and spatial footprint of your emergency lights. HDB flats require smart space utilization, meaning your emergency gear should not take up valuable real estate in your living areas. Compact, lightweight lights are easier to store in designated utility closets, DB box cabinets, or entryway drawers. Furthermore, lightweight devices are much easier for children or elderly family members to carry and operate safely if they need to move around the flat in the dark.
Matching Nitecore Light Types to HDB Room Layouts
To create an effective emergency lighting plan, you must match different Nitecore light categories to the specific functional zones of your HDB flat. The living and dining areas serve as the central gathering points for your household. To keep these spaces functional and comfortable during a blackout, omnidirectional lanterns or area lights are the ideal choice. These devices cast a 360-degree halo of light, making them perfect for placing on a dining table during a family meal or in the center of the living room to facilitate board games or conversation.

When selecting a lantern for your living area, look for models that feature versatile mounting options. A built-in magnetic base allows you to secure the light to metal surfaces, such as the frame of your household shelter door or certain metal shelving units. Hanging loops or carabiner clips are also highly useful, enabling you to suspend the lantern from a ceiling hook or an inactive ceiling fan bracket. This elevated placement mimics standard overhead lighting, casting a wide, shadow-free glow across the entire room.
For bedrooms and narrow corridors, directional flashlights and hands-free headlamps are far more practical than stationary lanterns. Navigating the hallway to reach the bathroom in the dark can be a tripping hazard, especially in households with young children or elderly residents. A headlamp is exceptionally valuable in these scenarios, as it keeps your hands completely free to assist family members, carry supplies, or hold onto walls for balance. Look for headlamps with adjustable bands and tilting brackets so you can direct the light exactly where you are looking.
In the bedroom, a compact directional flashlight kept on your bedside table provides immediate reassurance when the power suddenly cuts out. Many Nitecore flashlights feature a flat tail cap design, which allows them to be stood vertically on a flat surface. This “tail-standing” capability lets you use the flashlight in candle mode, pointing the beam directly at the ceiling to bounce soft, indirect light throughout the bedroom. This method prevents direct glare and creates a much more relaxing environment while you wait for the power to return.
Your emergency preparation should also extend to immediate-access locations, such as your entryway or the exterior of your household shelter. Compact keychain lights or pocket-sized flashlights are invaluable for these zones. These ultra-portable lights can be attached to your main set of house keys or stored in a small drawer near the front door. Despite their diminutive size, modern keychain lights offer impressive brightness levels and simple interfaces, providing the instant illumination you need to locate your larger emergency lanterns and headlamps.
Essential Label Checks Before Purchasing
Before purchasing any Nitecore emergency light, it is crucial to perform a thorough check of the product labels and specifications to ensure safety, compatibility, and long-term reliability. Start by verifying the battery type and charging interface. Built-in lithium-ion batteries offer the convenience of USB recharging, which aligns perfectly with the USB-C or Micro-USB cables you likely already use for your mobile devices. If you choose a rechargeable model, ensure the charging port is protected by a snug, high-quality rubber cover to prevent dust and moisture from entering the delicate internal electronics.
If you prefer a light that will sit in storage for years without any maintenance, look for models that accept replaceable lithium or alkaline batteries. Lithium AA or AAA batteries have an exceptionally long shelf life—often up to 10 years—and are highly resistant to leaking compared to standard alkaline batteries. For the ultimate flexibility, look for dual-fuel models that can accept both a proprietary rechargeable battery pack and standard household batteries, giving you the best of both worlds during a prolonged blackout.
Next, evaluate the Ingress Protection (IP) rating of the light, which indicates its resistance to dust and water. Singapore’s tropical climate is characterized by high humidity, which can slowly degrade electronic components over time if they are not properly sealed. For indoor emergency storage and use, an IP rating of IPX4 (resistant to water splashes from any direction) is the bare minimum you should look for. If you plan to store your emergency lights in a utility yard or kitchen area where they might be exposed to steam or accidental spills, upgrading to an IP66 or IP68 rating provides superior peace of mind.
Finally, always check the product packaging and device body for recognized electrical safety and battery certification marks. Look for international standards such as the CE mark, FCC certification, and RoHS compliance. These certifications indicate that the manufacturer has subjected the device to rigorous testing regarding battery safety, electromagnetic interference, and the absence of hazardous materials. Purchasing certified products from authorized retailers protects your home from the risks of battery overheating, short circuits, or premature device failure.
Safe Storage and Maintenance for Long-Term Readiness
An emergency light is only useful if it works the moment you need it. To ensure your Nitecore lights are always ready for action, establish a simple maintenance routine. Rechargeable lithium-ion batteries naturally lose their charge over time, a phenomenon known as self-discharge. To combat this, set a recurring reminder on your calendar to check and top up the charge of your emergency lights every three to six months. Storing a lithium-ion battery in a completely depleted state for extended periods can permanently damage its capacity, drastically reducing its future runtime.
Proper storage conditions are equally vital for preserving the lifespan of your emergency lights and their batteries. Store your devices in a cool, dry, and easily accessible location that every member of the household knows. Avoid storing lights in direct sunlight, near heat-generating appliances, or in areas with extreme humidity, such as bathrooms or unventilated laundry yards. High temperatures accelerate battery degradation and can increase the risk of battery swelling or leakage. A dedicated drawer in your living room console or a clearly labeled container in your DB box cabinet is an ideal storage spot.
During your periodic maintenance checks, take a moment to physically inspect each light for any signs of degradation or malfunction. Look for physical warning signs such as a swollen outer casing, cracks in the plastic lens, sticky residue or corrosion around the battery contacts, or a noticeable drop in runtime after a full charge cycle. If you notice that a device becomes unusually hot to the touch while charging, or if the battery compartment appears warped, stop using the device immediately. Promptly replacing degraded equipment ensures your household remains safe and fully prepared for any future power disruptions.
Frequently Asked Questions (FAQ)
Can I use portable power banks to recharge emergency lights during a blackout?
Yes, most modern emergency lights that feature USB-C or Micro-USB charging ports can be successfully recharged using a standard portable power bank. Before connecting your light to a power bank, check the input voltage and current requirements specified in the light’s user manual—typically 5V/1A or 5V/2A. Ensure that your power bank’s output matches these specifications to prevent slow charging or potential damage to the light’s internal charging circuitry. Always use high-quality, undamaged charging cables, as worn or frayed cables can cause resistance, leading to inefficient power transfer and excessive heat buildup at the connection point.
How should I dispose of emergency lights with degraded built-in batteries?
Emergency lights that contain non-replaceable, degraded lithium-ion batteries must never be thrown into your standard household rubbish chute or domestic waste bins. When crushed or punctured in waste collection trucks or incineration plants, lithium batteries pose a severe fire and explosion hazard. In Singapore, you should dispose of these devices responsibly by taking them to designated e-waste recycling bins. These bins are widely available at community clubs, major supermarkets, and electronics retail stores across the island. Before dropping your device into an e-waste bin, place a piece of electrical tape over any exposed metal contacts or charging ports to prevent accidental short circuits during transport.

Community discussion
Share your experience or ask a question. Comments are reviewed before publication.